
Estimated reading time: 8 minutes
As customers begin to offer more options for the products they purchase, product listings and site designs get more complicated. In order to support such a personalized shopping experience, you might have to get pretty creative with how you list your items. When you also factor in inventory, stock management, and variants, it can feel like a real mess; but then you try to add discounts and sales on top of that? Oy vey!
While Miva is super powerful when it comes to discounts, it can also get complicated. This guide will show you our favorite way to set up product discounts on your variant items!
Why Does it Matter if My Products Use Variants?
You may be wondering how variant products differ from standard attributes when it comes to discounts. They look indistinguishable in the store – the customer certainly doesn’t know the difference.
That is all true, but in the backend of your site, variants and standard attributes are quite different. Variants don’t just keep track of your inventory, they are actually their own unique products that require their own set of controls. They can also react to promotions separately from each other, even if they all belong to the same master product.
This is where it can get tricky with sales and promotions, especially if you want to offer a discount on only SOME of your variant options.
In this example, our client uses variants for their product sizes. Each size option is its own variant, and thus, its own product (at least, behind the scenes).
Because the sizes labeled BULK are already discounted, she wants to offer a 15% product discount, but exclude the bulk options.

Setting Up a Discount on your Variant Product
There are a few different ways to provide product discounts, but in order to exclude specific variants on a product, we want to focus on the Product Discount Price Group Type. This client specifically wants to offer it as a Coupon Only discount, but it can also be applied to All Shoppers, All Logged-In Customers, or Specific Customers. If you’re unsure of the difference, we have a more complete guide on using Miva 10 Price Groups here.
Step 1: Add Price Group
| TIP: If you run a lot of promotions, it’s a good idea to make your price group name simple but specific, listing any details about the promo that may affect how it operates. |
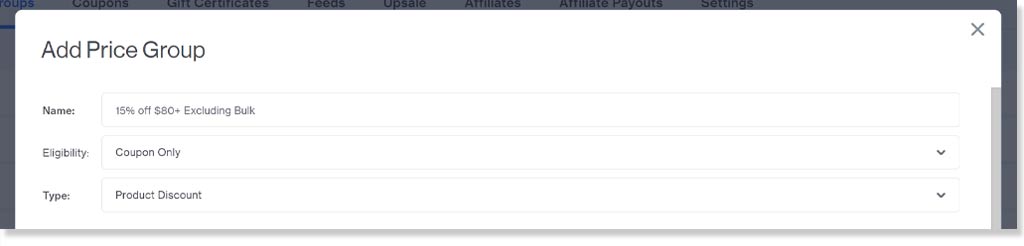
- Click the blue Add Price Group button.
- Fill in a Name
- Select your Eligibility. This client wants the promo to be applied via Coupon Code so we selected Coupon Only.
- Set the Type as Product Discount.
Step 2: Discount Settings and Restrictions
TIP: Try keeping your promotion as simple as possible. It will reduce the number of possible complications, and confusion from shoppers.

- Fill in your Discount. The Fixed option will discount a specific dollar amount from the product. This client chose a 15% discount.
- Apply any necessary basket or qualifying Restrictions. These are terms that your customer must reach before the discount is applicable. This client chose to enforce a minimum order amount of $80. The product subtotal must be at least $80 for the cart to be eligible for the discount.
Step 3: Price Group Settings and Exclusions
| TIP: The basket description will show up on invoices, in the basket, and in emails. Make sure it’s short, descriptive, and will make sense to the shopper. |
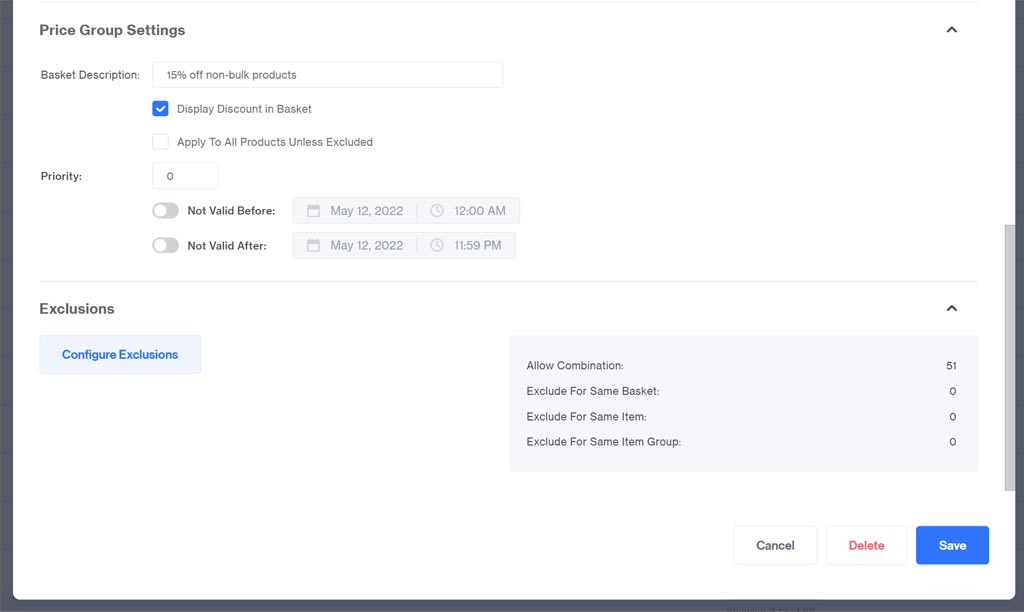
- Add a Basket Description. If you leave this blank, the Price Group Name will show in the basket and checkout.
- If you want to plan this promotion for a future date, or want it to end at a specific time, make those selections using the Not Valid Before/After fields.
- The Configure Exclusions button will allow you to select how you’d like this price group to interact with other existing price groups. For example, if you have a Specific Sale Price price group set up for your clearance items, and you don’t want to offer the discount on those clearance items, exclude that price group using the Exclude for Same Basket setting.
| IMPORTANT: If you plan on offering the discount to all products and all variants, you can skip to Step 5! |
Step 4: Discounted Products and Variants
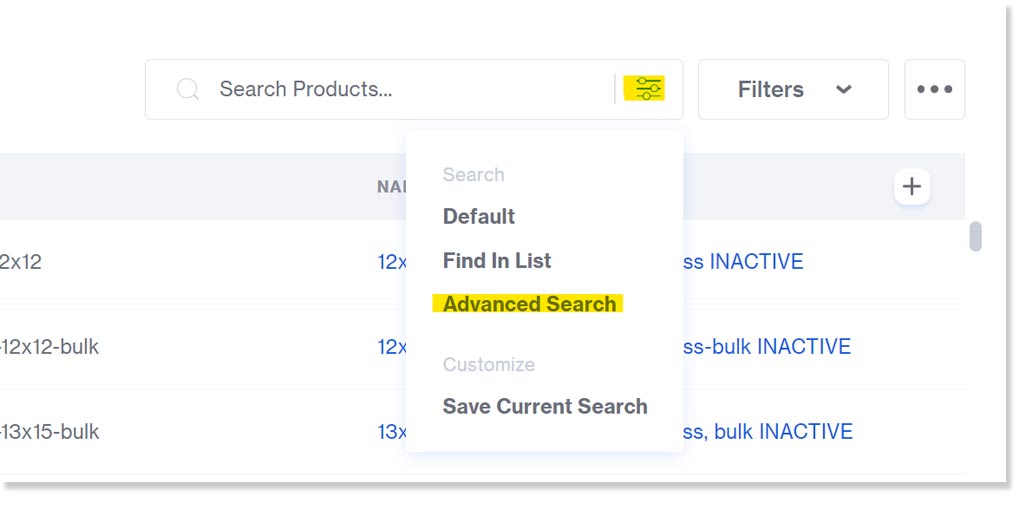
| Tip: Use the Advanced Search function to easily narrow down your products by a large range of different options. |
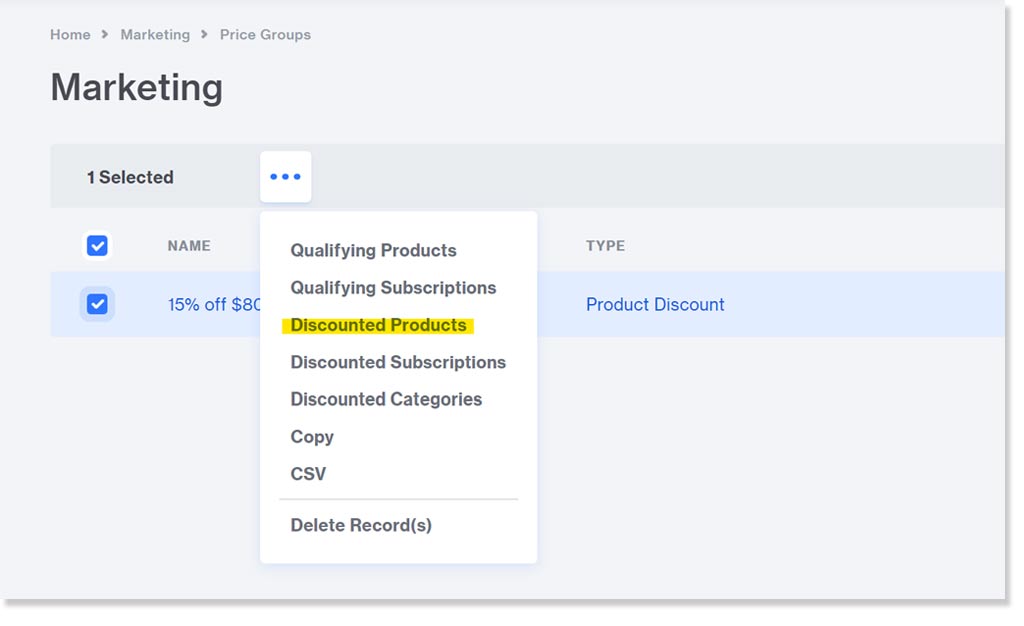
- Click the checkbox next to your new price group and click the “ … “ menu.
- Select Discounted Products.
- In the window that pops up, make sure you adjust your view settings. You want to ensure you’re seeing All products (variant items are technically inactive, so if you’re viewing only Active products, you won’t see them).
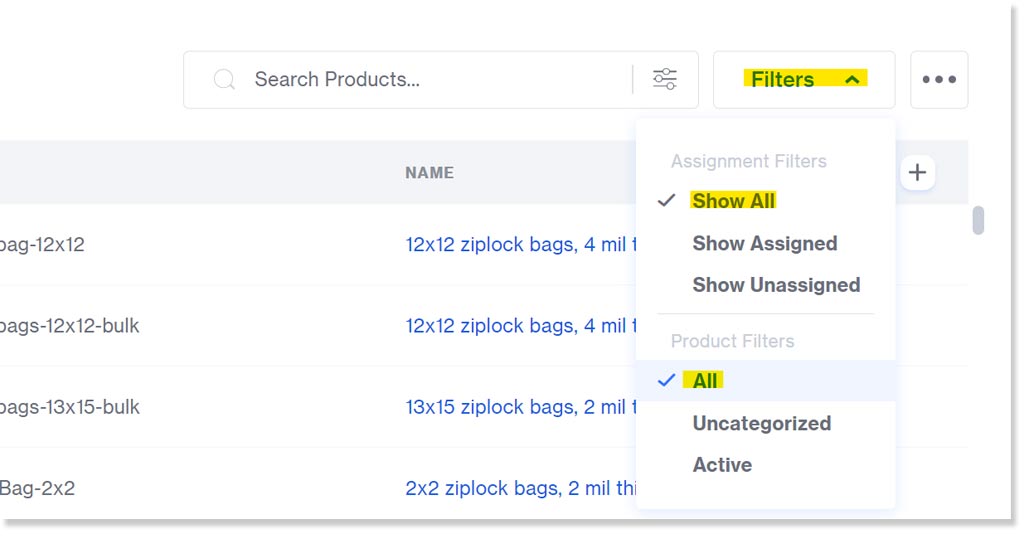
- Search or scroll to find the products and variants you would like to be APPLICABLE for the discount. If it’s going to be most of your items, and only a few excluded, then it will be easiest to assign all, then go back and unassign the excluded items.
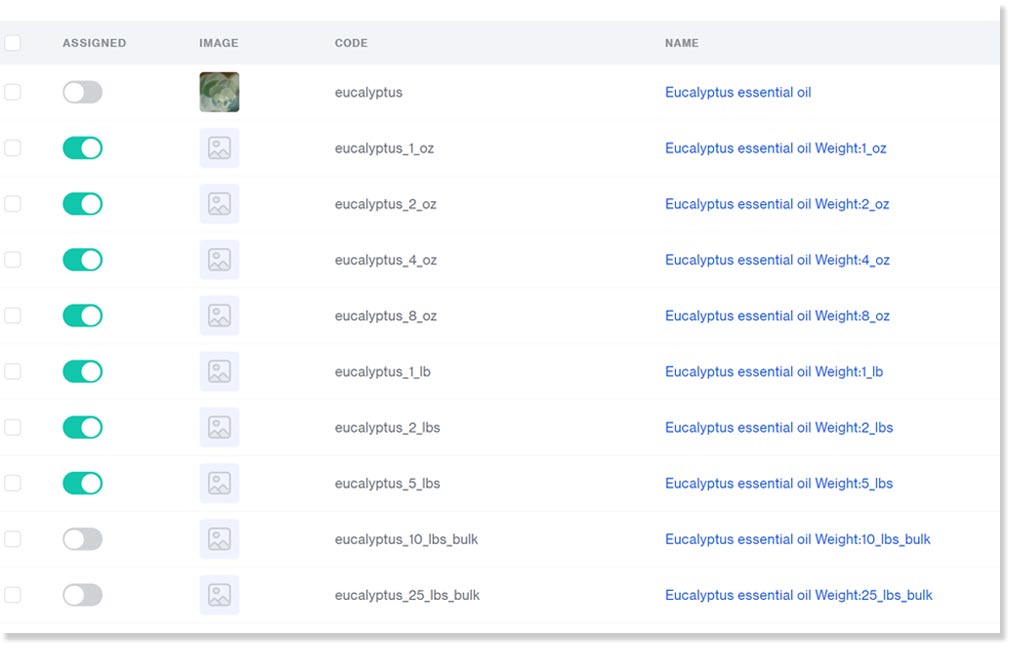
- Use the Assign toggle to add/remove products that should be discounted.
- Use the Advanced Search to help narrow down your product catalog, if needed. I used the advanced search to find all products that contain the work bulk in the product code, in this case.
- In this list of Discounted Products, I have ASSIGNED all products that should be eligible for the promotion.
- In order to ensure your discount only applies to the permitted variants, you need to UNASSIGN any master products. If the master product is assigned to the discount, Miva will assume that all variants should be as well.
You can now see, from my example below, that the Master product Eucalyptus essential oil is not assigned, and neither are the 2 bulk sizes at the bottom of the list. All other sizes of this product are eligible for the discount, so they are all assigned!
Step 5: Coupon Code
| TIP: Try to limit symbols or case-sensitive letters in your coupon code. The simpler, the better. |
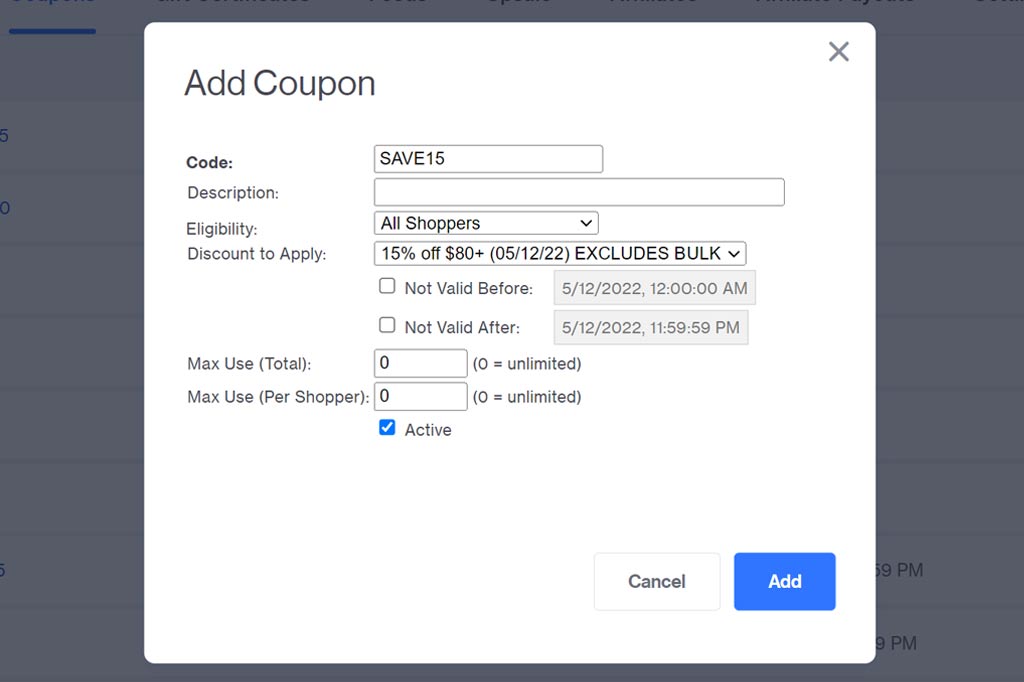
- In the Coupons tab of your Marketing section, click the blue Add Coupon button.
- Choose a simple coupon code that relates to the promotion in some way.
- Select the Discount to Apply from the drop down list. Your new price group should be listed there.
- As with the price group, if you want the coupon to have valid dates, enter those.
Step 6: Test Test Test!
| TIP: Embody your most frustrating customer and do everything possible to try and break the coupon or get around its rules! This is how you’ll find bugs and loopholes. |
- To properly test, try adding multiple combinations of products to your basket to see if the promotion works, and if the exclusions and restrictions are behaving the way you want them to. If you run into an error, take a screenshot of your basket so you know exactly how you got there, and try to replicate it. Tweak your settings as needed.
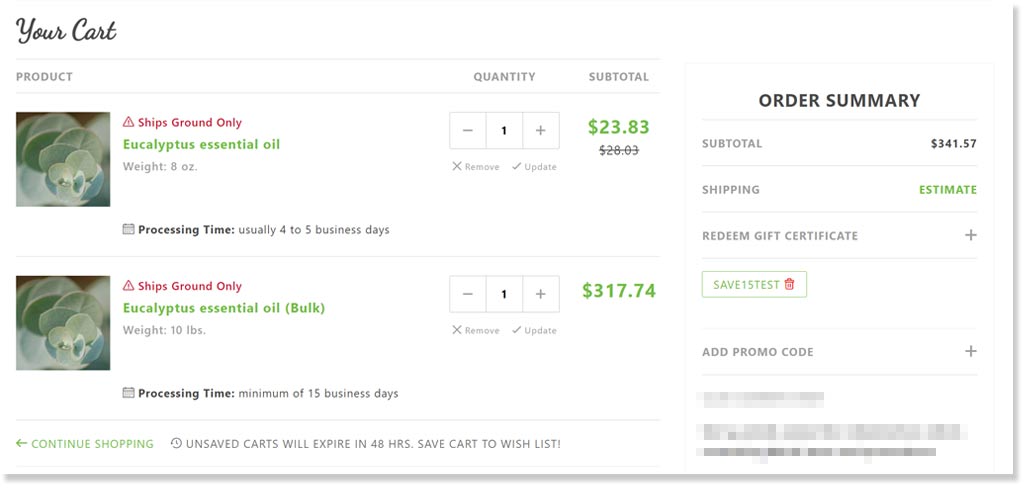
When testing my coupon code, I can see that the discount code is taking the 15% off of the 8 oz size, but is not applying to the 10 lb bulk size. Perfect!
Once your testing is complete and you’re confident that your promotion is going to work the way you want it to, it’s time to update your banners, add some fun images, and make social media posts to get the word out! Your promotion will really only be successful if shoppers know that it’s running. If you need a hand setting up your next promotion, let us know!