Estimated reading time: 14 minutes
Most articles and tutorials will talk about how to Get The Sale. They often focus on things that need attention before a customer has made a purchase, and for good reason. That’s some important stuff, but getting the sale is really only half the battle. For sustainability and long-term success, you need to keep the sale. Or more aptly, keep the customer.
Happy customers are returning customers, and returning customers mean a loyal fan-base. A solid foundation of loyal customers can do significantly more for you than any other kind of advertising. This is a Miva tutorial to show you how to make the most out of its customer service features.
Customer Service Should be Top Priority
Multiple studies over the last decade (like this, this and this one) have shown time and again that word-of-mouth marketing is a major player when it comes to influencing sales. And if you want those words to be positive, customer service is a great place to start.
Consumers have ranked customer service as #1 for building trust with a company, and a whopping 89% have switched to a competitor following a poor customer service experience (Nextiva). Those are NOT statistics that you want to be on the wrong end of.
There are plenty of resources available for tips on empathizing with your customers, the right and wrong phrases to use during correspondence, and how to go the extra mile. This Miva tutorial, however, is a little more utilitarian than that. This is a hands-on list to walk you through some of the most common Miva procedures relating to customer requests.
Most of your customer service queries will involve making edits in one of three screens in Miva: Catalog, Order Processing, and Customers. This walkthrough will cover the last two as they pertain specifically to orders and accounts.
Order Processing
While online shopping is second nature for some, others need some hands-on assistance. Whether they want to place an order with a live person, need to correct errors, or have changed their minds, you should know how to help. The following steps will show you how to create an order from scratch; most order adjustments will piggy-back off of the same steps.
Create/Update an Order
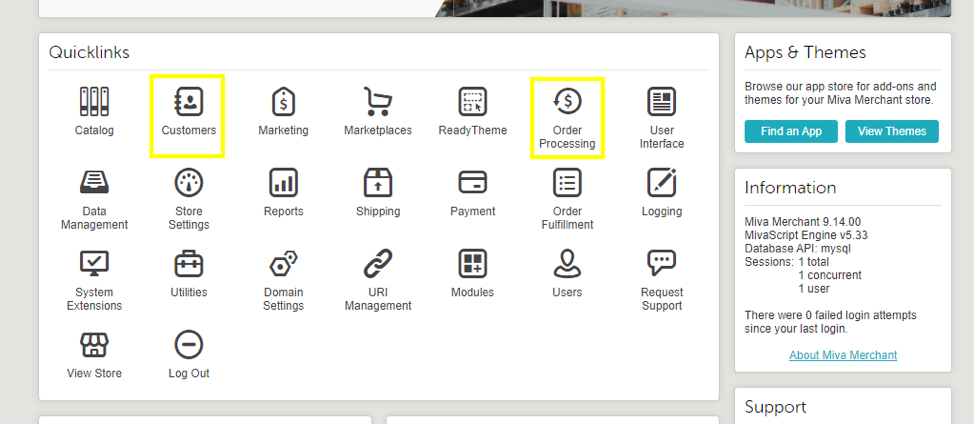
From the home screen:
- Click on Order Processing.
- Click the + button to create a new order.
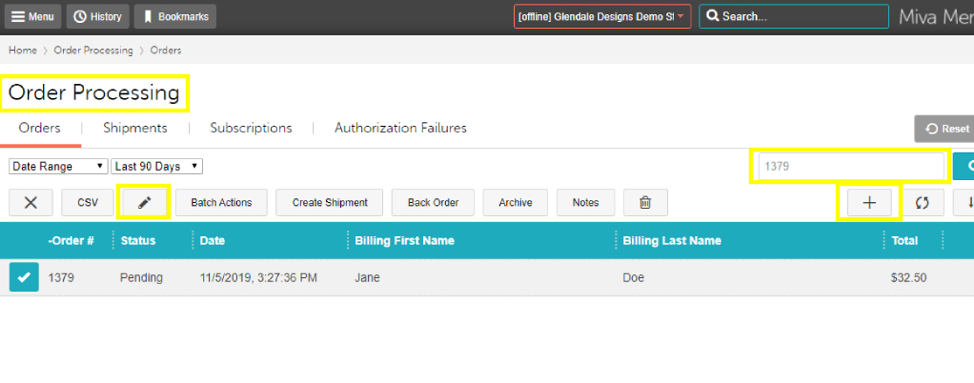
This will take you to a blank order screen.
Alternatively, if the customer has already placed an order:
- Type the order number into the search bar on the Order Processing screen.
- Double-click the order or click the pencil (Edit) button to open the order.
Collect/Update customer information
If you’re creating a new order for a customer, you have a couple of options to fill in their shipping and billing information.
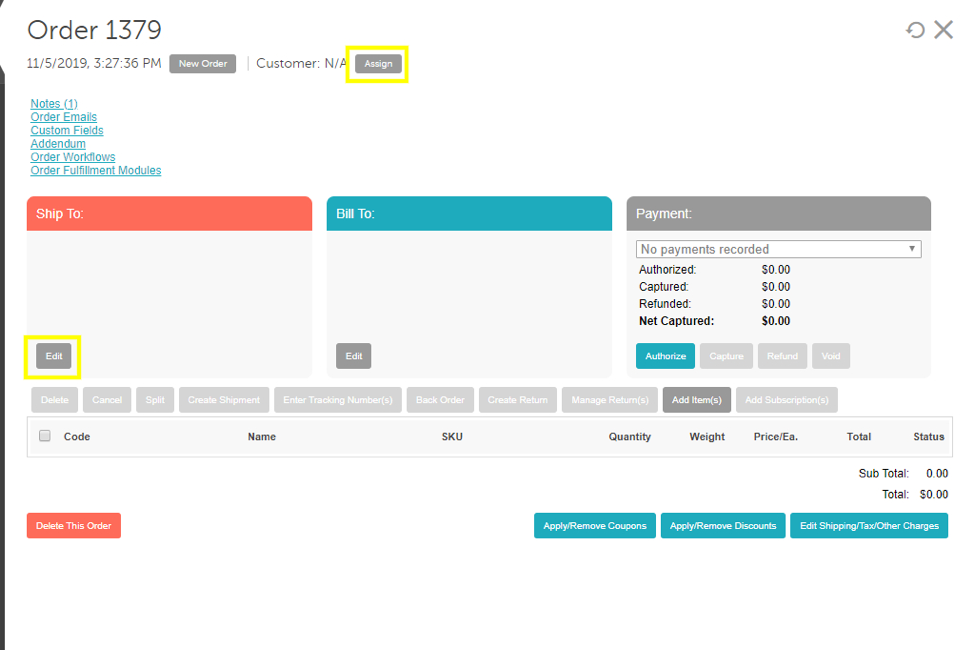
If they already have a customer account with you:
- Click the Assign button to search for their account.
- Click Use Selected Customer to apply the existing customer profile.
If they are a new customer or do not have a saved customer account:
- Click the Edit button under the “Ship To” field to fill in the customer information.
- If the “Ship To” and “Bill To” information is the same, check the Update Both Addresses box.
- Otherwise, fill in each section separately.
Customers will often call, email, or chat to update their address information, either because it was entered incorrectly or because there’s a change in shipping plans. Editing the information works the same way as adding it new. Click the Edit button and make any necessary changes.
Add/Edit Items
Adding and editing items on an order will allow you to access your product catalog inside a customer’s order, whether you’re placing a new one, or editing an existing order. Depending on your company policy, customers may be able to add to or change an order after it is placed.
To add items while placing an order for your customer:
- Click the Add Item(s) button.
- Type the product code into the Code field.
- The blue Lookup button will allow you to search the catalog for an item. This is helpful if your customer doesn’t have the product code for the item they’d like to add.
- Fill in any attributes and the quantity. Be sure you’re familiar with character limits and attribute restrictions (ie. specific size availability, fonts for personalization, etc.).
- Click the blue Add button. The Add+ button will allow you to add multiple items to the order.
To edit an item on an existing order:
- Click the blue Code that shows to the left of the product name. A window will pop up.
- This window will allow you to edit the price of an item (in the case of overriding an incorrect price), edit the quantity on the order, and edit the product attributes.
- Click the blue Save button once your changes have been made.
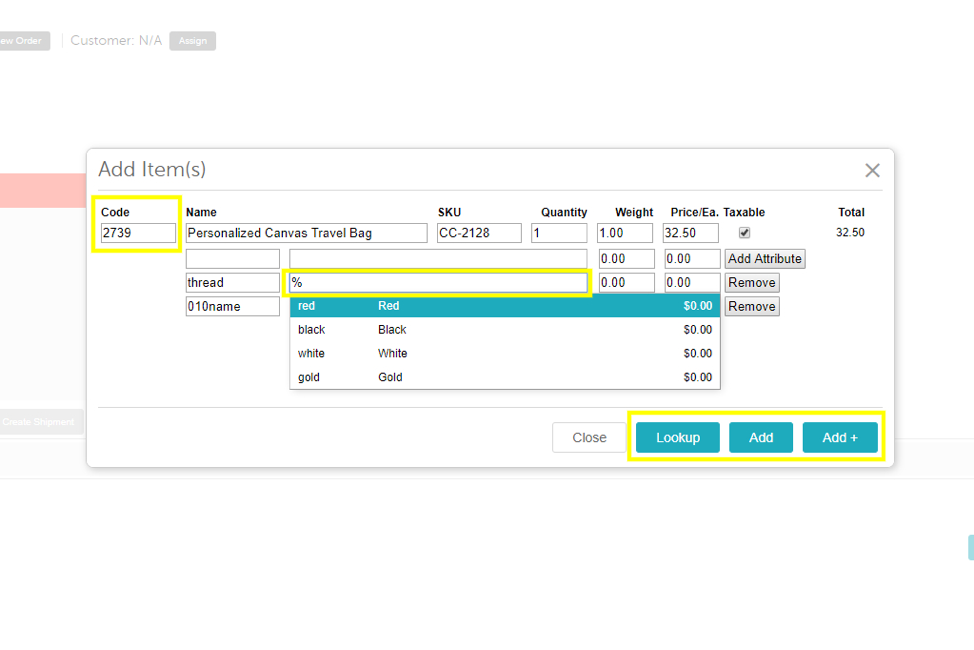
Tip: When adding/editing an attribute that has preset options, you can enter the percentage symbol (%) to list the options.
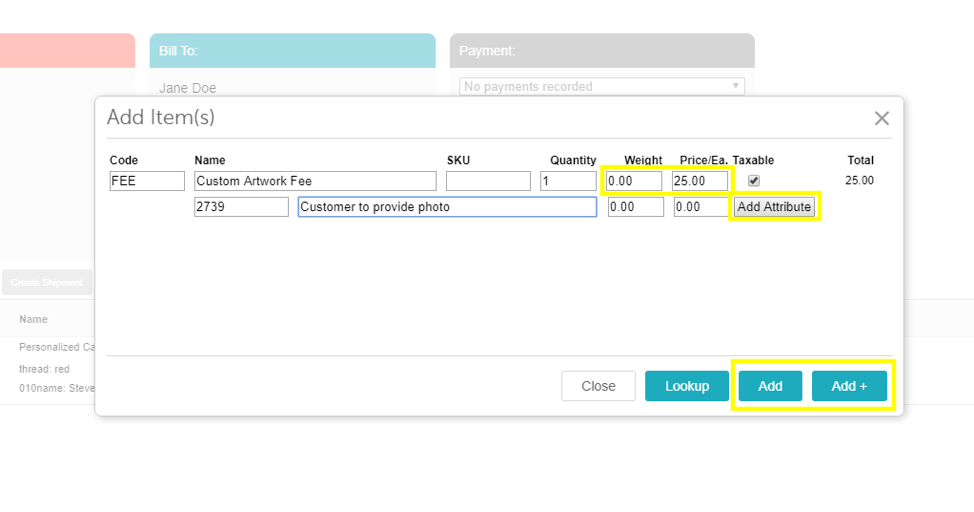
Using this same method, you also have the option of adding an item to the order that does not exist as part of your product catalog. For example, if you have a special circumstance that requires an additional fee or a customer is asking for an extra part to be sent, you can add them as line items. This will also ensure they appear on the packing slip.
To add a non-catalog product:
- Add an item as in the previous steps.
- Instead of entering an existing product code, enter the details of a special fee/item.
- If the addition is a physical product (as opposed to a service fee), be sure to include the shipping weight.
- Include the quantity and the price.
- You can add details about the fee by entering them as attributes. Type in the details and click the Add Attribute button.
- Click the blue Add button.
Tip: If the customer has any coupons or discounts applied to the order, they may also apply to the new line item. If you would like to avoid this, enter the fee as a charge, as in the following section.
Add/Remove Coupons and Discounts
This is another section that will depend on the policies of your company. Many do not allow coupons to be applied after the order is placed, or may restrict use if the order is not placed online. There are often special circumstances that warrant the use of coupons, however. Adding and removing coupons works the same way whether you’re editing an existing order, or placing a new order on behalf of a customer.
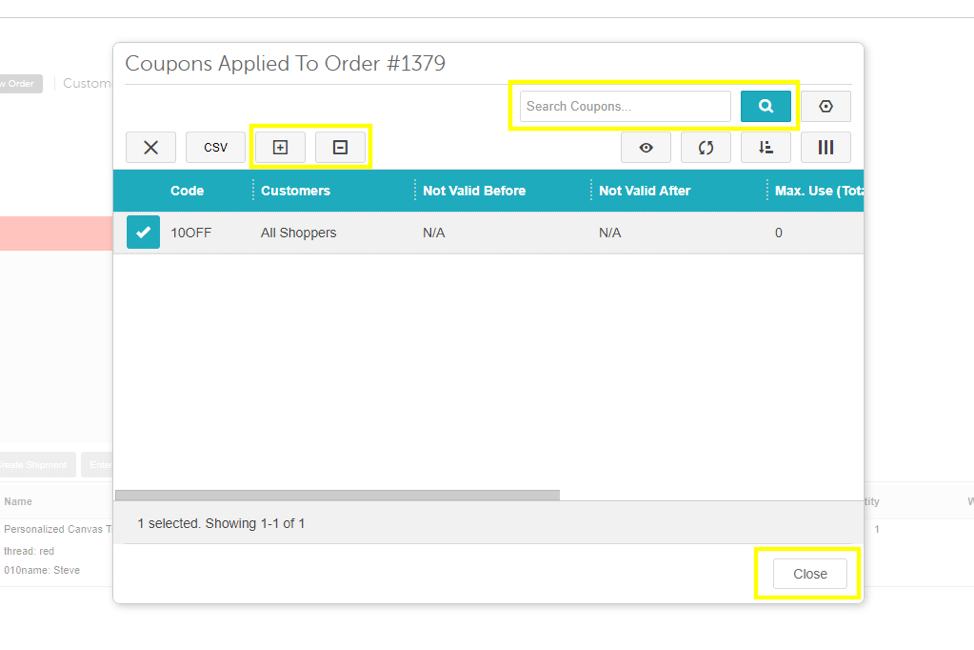
To add or remove coupons:
- Click the blue Add/Remove Coupons button found below the order total. A window will pop up.
- If necessary, search for the coupon you need to apply or remove.
- Click on the coupon. To add the coupon, click the + button. To remove it, click the – button.
- Click close.
To add or remove discounts:
- Click the blue Add/Remove Discounts button found below the order total. A window will pop up.
- Search for the price group you need to apply or remove.
- If you have a coupon already applied, you will see that coupon’s price group applied to the order.
- Use the toggle switch to turn the price group on or off.
- Click close.
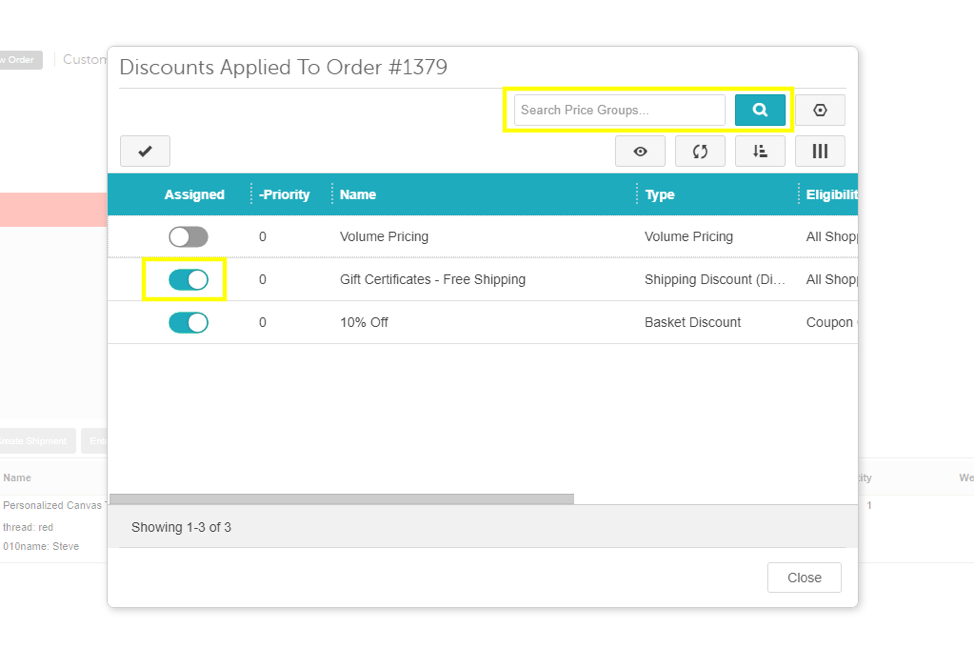
Tip: If you turn off a price group that has a coupon attached, the coupon won’t work on the order. Be sure to only disable the price group you need.
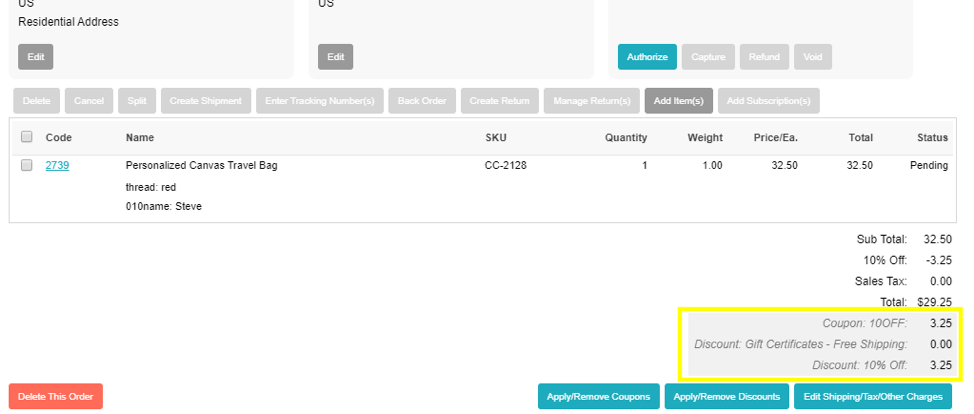
You will be able to see which discounts are applied (and their savings) at the bottom of the order.
Taxes, Charges, and Shipping Settings
There are several reasons that you may need to update, add, or change shipping in an order. A common issue that affects shipping is an incorrect zip code. As Miva calculates shipping rates based on the zip code and state, an error in the address can cause shipping discrepancies. Once the address is corrected, you’ll need to add shipping to the order.
There are also cases where the shipping method needs to be updated. Whether you offer free pick-up or different levels of shipping services, it is not uncommon for a customer to change their mind and want to change the method. When shipping methods change, you also need to remember to update the taxes.
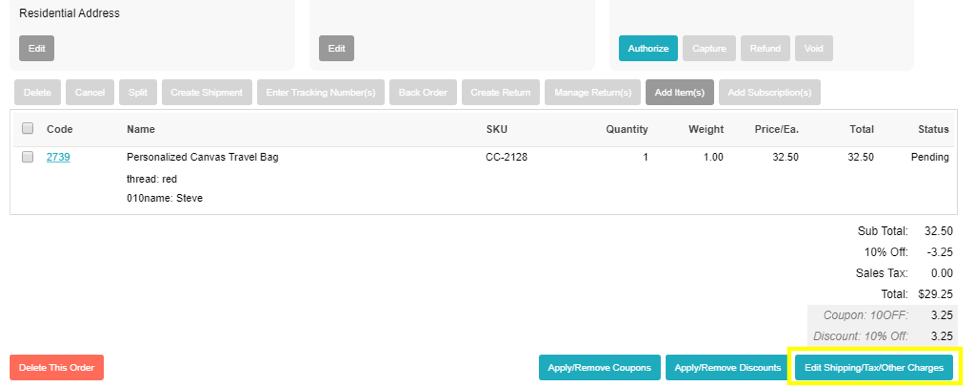
Add or edit shipping on an order and update taxes:
- Click the blue Edit Shipping/Tax/Other Charges button. A window will pop up.
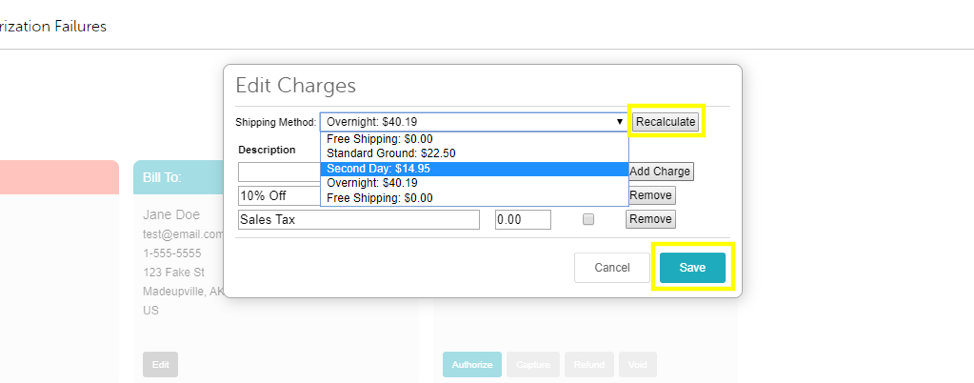
- Choose a shipping method from the dropdown menu.
- Click the Recalculate button to add or change the shipping method and update the tax amount.
- Click the blue Save button.
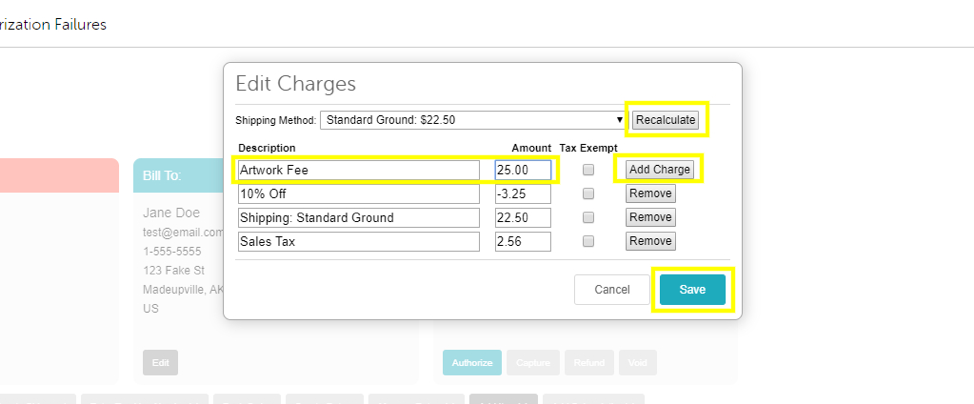
To add a special charge:
- Click the blue Edit Shipping/Tax/Other Charges button. A window will pop up.
- Enter the details of your special charge into the text field, including cost.
- Click the Add Charge button.
- To adjust the taxes, click the Recalculate button.
- Click the blue Save button to finish.
Processing Payment
There are a few situations in which you may need to process payment manually.
- Creating a new order
- Adding items or upgrading shipping methods (requiring additional payment)
- Manual payment method (you may have this option on your site depending on the type of products you sell, or certain restrictions that may require manual payment processing).
Regardless, the method to process a payment manually is simple.
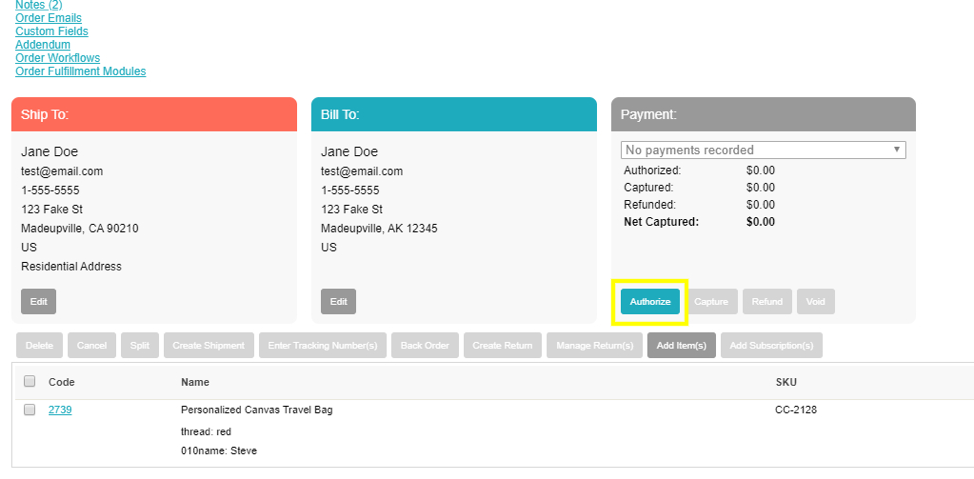
Process a payment:
- Ensure your totals, taxes, shipping, and discounts are correct.
- Click the blue Authorize button under the Payment sections.
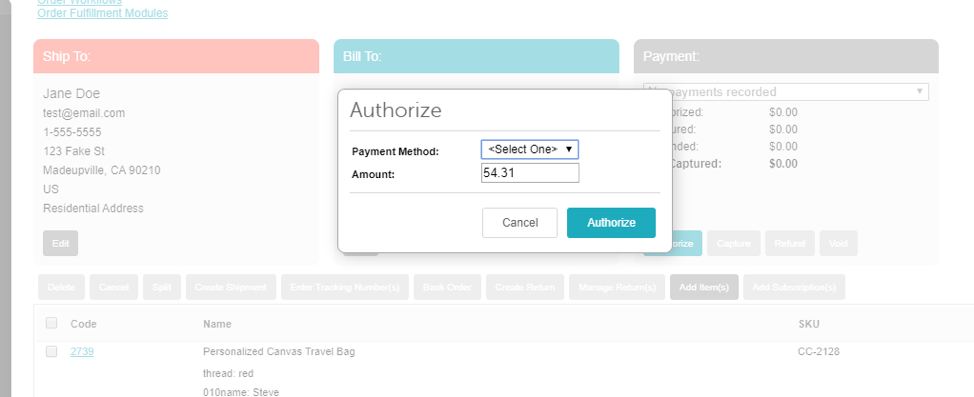
- A window will pop up, allowing you to select a payment method and enter the total. If a customer is making a change on an order that already has partial payment applied, enter only the remaining balance.
- Fill in all payment information, including (where applicable), credit card name, number, expiry, and security code.
- Click the blue Authorize button.
Order Emails
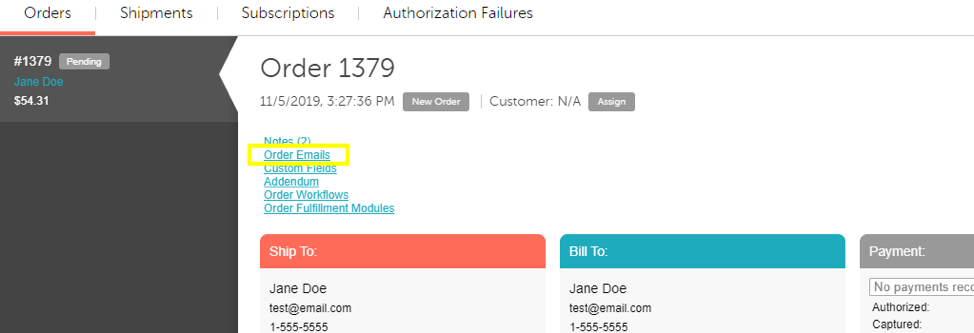
Once you’ve got your order placed or updated, it is critical to resend a copy of the order confirmation email. This not only confirms that the changes have been made, but it’s a good idea to get your customer to review the email to check for errors. Because you’ve entered the information yourself, you may be held liable for any errors.
To (re)send any emails:
- Click on the blue Order Emails link at the top of the page. A window will pop up.
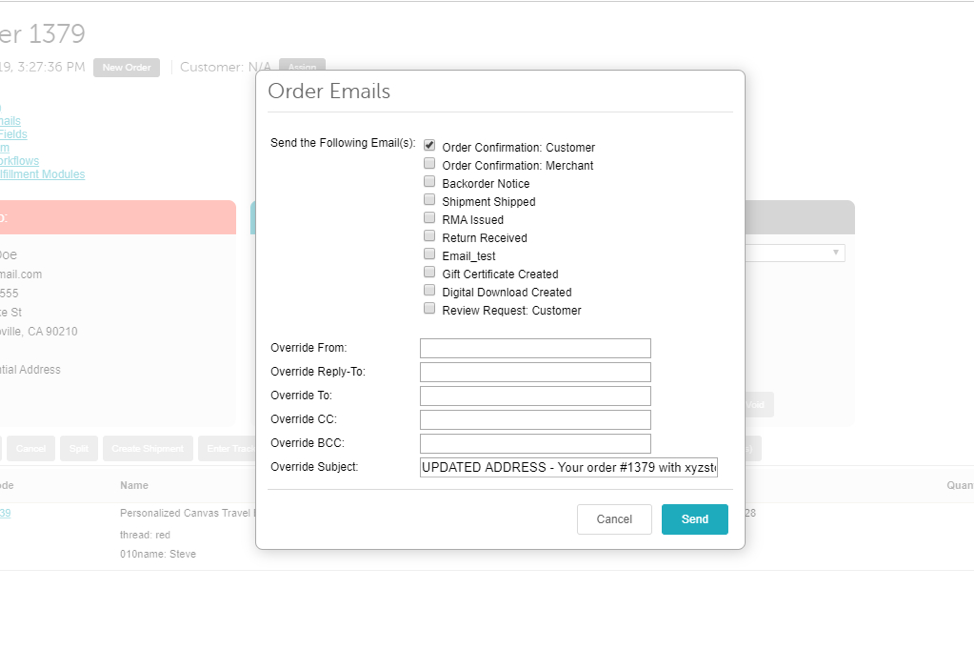
- Select which email you’d like to send. The options listed will vary, depending on how your store has been set up.
- You can choose to override the email addresses and subject here. You may want to update the subject to include why or how the order was altered (ie. “UPDATED ADDRESS – Your order #1379 from…”).
- Click the blue Send button.
Tip: Whenever you resend an order email, send one to your company order desk so you also have a copy of the changes made.
Customers
It’s typically less common than changes to orders, but customers will, from time to time, contact you to make changes to their account. Any changes to the customer profile can be made in the Customer section of Miva.
Find/Edit Customer Accounts
Some complaints are unavoidable, but knowing how to address them quickly and efficiently will reassure your shopper. For instance, customers will often call to complain that they are receiving an error message about their email address not being found. This is typically one of two cases:
- They have never created a customer account
- They used a different or incorrect email address when creating an account
Either way, the first step to resolving the complaint is to search for the account. You will follow the same steps if the customer needs help editing their address or other contact information.
To search for and edit a customer account:
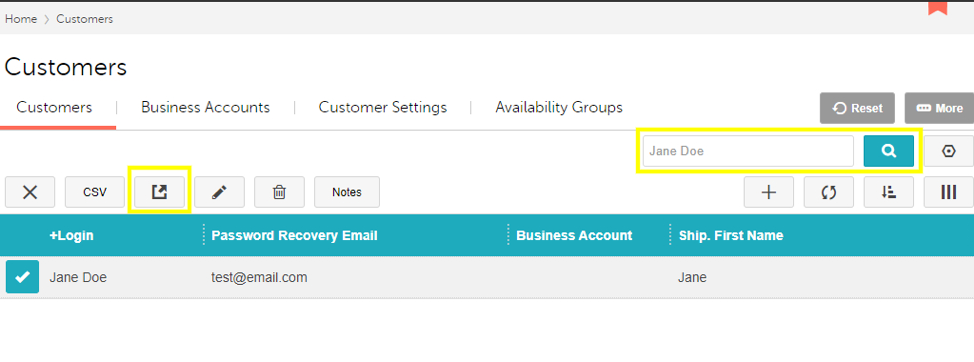
- Go to the Customers page.
- Search for the customer in the search bar. It’s a good idea to start with the email address as you may have 10 “Jane Doe” accounts, but you’ll only have one with the email address “test@example.com”.
- If the customer made a typo in their email address or name, edit the account by clicking the Open Customer button.
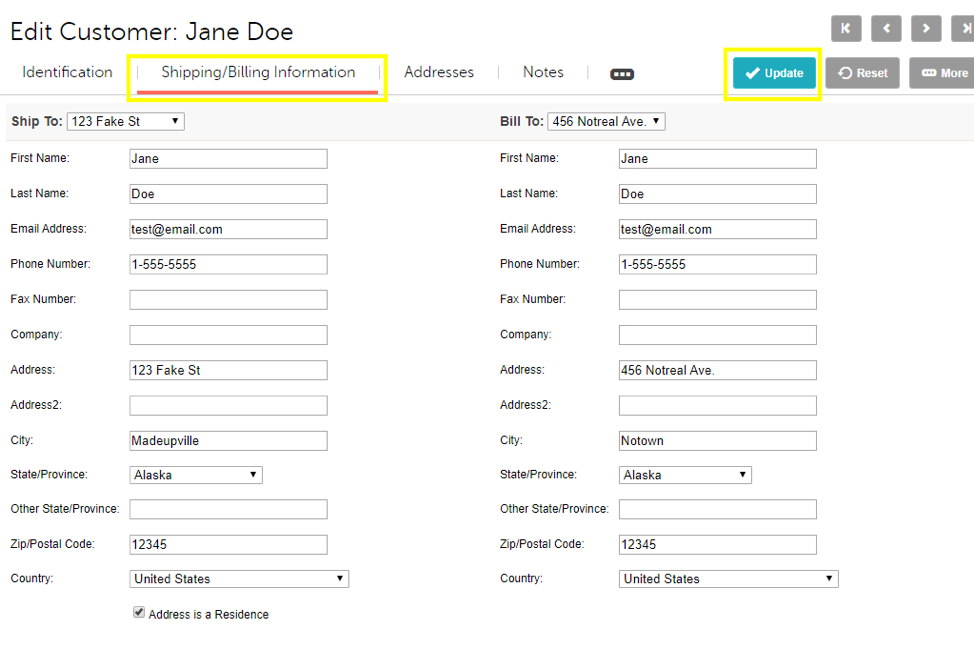
- Confirm the address matches to ensure you’re editing the correct account. Make any necessary changes, then click the blue Update button.
Tip: If the customer was mistaken, and they have not made an account, you can offer to set one up on their behalf. Click the + button to create a new account, and fill in their address/contact information. Make the password something simple, and ask them to change their password right away.
View Previous Orders
Occasionally, customers may need you to access old orders that they’ve made on their account. Perhaps they want to reorder a specific product and can’t remember which one or they may need a record sent for a business reimbursement.
To find a customer’s previous order:
- Search for the customer. Click Open Customer to view the customer’s profile.
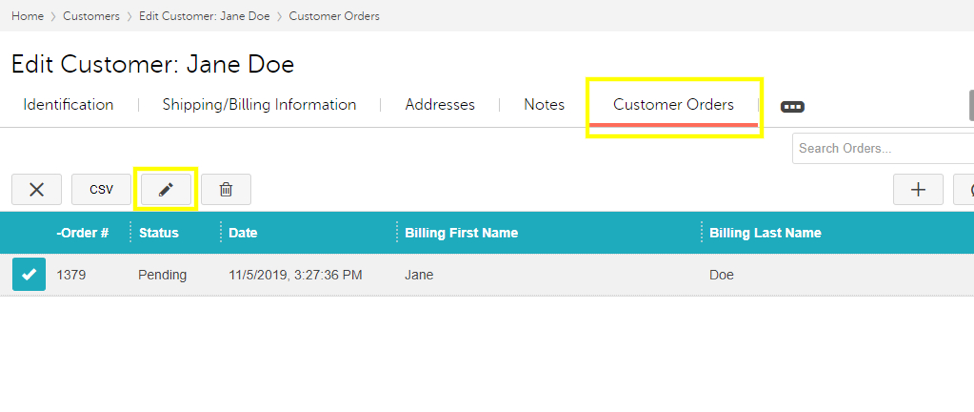
- Navigate to the Customer Orders tab.
- Here you will find every order that the customer made while logged in to their account. Select the order you need then either double click, or click the Edit button to open the order.
Tip: You can create a new order for the customer under their account by clicking on the + button. Proceed with the new order as demonstrated in the previous section.
Reap The Rewards of Good Service
Mistakes will happen, and customers will turn to you for assistance in correcting them. Reference this Miva tutorial for quick guidance on how to perform some of the most common customer service functions in Miva. With an understanding ear and a willingness to help, your customer will be confident that they are getting the service they deserve. And that service will keep them coming back. If you or your team think you could benefit from even more Miva training, contact us today.