
Estimated reading time: 11 minutes
Not only is there a seemingly endless list of promotion types you can offer in your Miva store, but in some cases, there are also multiple ways to accomplish those promotions. This guide will take you through two different ways to offer your shoppers a free product at checkout, both using native Miva functionality. Both options have their own pros and cons, so you can review and decide what will work best for your preferences.
A free gift at checkout is a great way to encourage your shoppers to spend more and reward them for doing that. It can also be a beneficial way to unload overstocked inventory, or provide a bonus to a shopper for meeting other specific conversion goals.
Option One: Free Product Via Price Group
Using a price group to set up a free product upon checkout is probably the first thing that comes to mind, especially if you’re familiar with Miva’s expansive discount system. The Marketing screen of your Miva Admin has a Price Groups tab that allows you to create a ton of options to provide incentives to your shoppers.
The Add-On Product price group is the one you’ll be using in this case. As the name suggests, the function of this price group is to automatically provide customers with an extra product in their basket, usually based on what’s already in there.
Step 1: Creating Your Free Product Price Group
To set up your Price Group, you’ll be working in the Marketing screen of your Miva Admin.
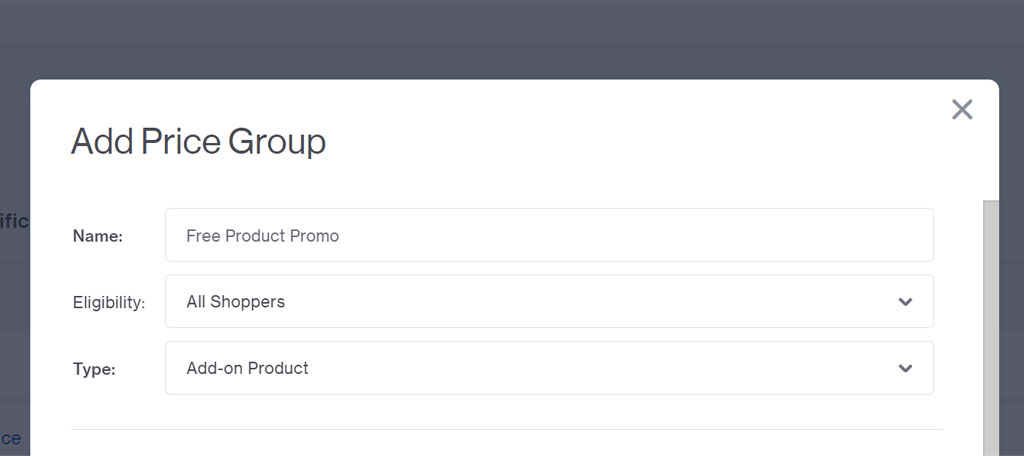
- Click the blue Add Price Group button.
- Fill in a Name. We recommend being specific here.
Ie, Instead of: Free Product
Use: Free Sunglasses w/ Hat
If you continue using this price group in the future, you can always edit the name to change the details.
- Select your Eligibility. You have some freedom here to decide how you’d like to offer this little bonus.
- All Logged-In Customers. Use it as a way to encourage repeat customers (ie. Come back by September 5th and earn a FREE laptop case with your purchase!) or to create an account by offering the product to “All Logged-In Customers”.
- Coupon Only. Tempt your subscribers to open and read your email marketing each month by offering a different free product with a coupon code found in the newsletter. Set your price group to “Coupon Only”.
- Specific Customers. Really narrow down your offer by providing it to “Specific Customers”; this will take “all logged-in customers” to the next level by allowing you to choose specific customer accounts. This might be a good way to ensure your retailers get a sample of the new product you’re offering on your wholesale site.
- All Shoppers. Off the product based only on basket restrictions, or no restrictions at all! Using the “All Shoppers” option will strip away the extra level of restrictions so shoppers aren’t forced to have an account or a code handy.
- Set the Type as Add-On Product.
Step 2: Discount Settings and Restrictions
| IMPORTANT: You can’t choose products which require attribute selections. Because the product is added to the cart automatically, the shopper doesn’t have the chance to fill out attributes. |
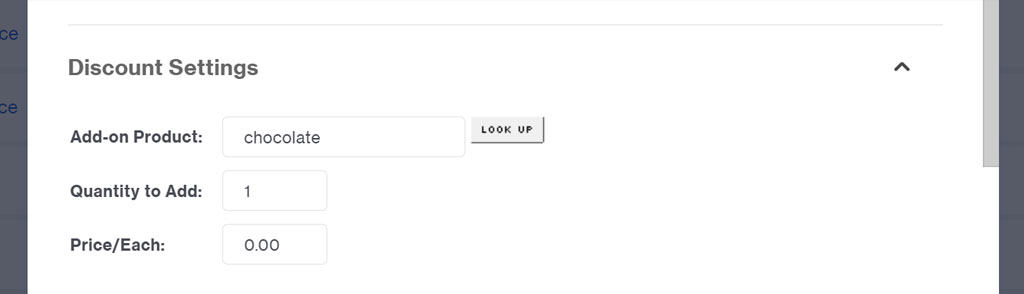
Upon selecting Add-On Product as your Price Group type, you’ll see a set of fields that apply only to this type. These fields will allow you to determine what you offer to your shoppers.
- Use the Look-up button to search for and select the free product you’d like to give away in your checkout. While you can offer a variant here, it may take a little extra data work to ensure that everything looks nice (ie. Change the variant Name, add a photo if there isn’t one.)
- Fill in a quantity. Most often, this field will be set to “1”. However, depending on the product you’re offering, you may want to provide more. Maybe you’d like to add 3 classic vinyl stickers to orders that contain a skateboard.
- Set your Price/Each. If you intend to offer a free product, then of course, this value should be set to 0.00. That said, you can also use this Price Group type to offer deep (but conditional) discounts, ie. Get 3 sets of strings for $3.00 when you purchase a guitar. You would select the strings as your product, fill in a quantity of 3, and add a price/each of $1.
- Apply any necessary Basket or Qualifying Restrictions. These are terms that your customer must reach before the discount is applicable. For example:
- Fill in a Basket Subtotal so shoppers must spend a certain amount before receiving the free product.
- Add a value for Qualifying Quantity. This will require the shopper to purchase a certain number of qualifying products in order to get the free item (“Buy 3 t-shirts and get a free beanie!”).
Step 3: Price Group Settings and Restrictions
- If you want to plan this promotion for a future date, or want it to end at a specific time, make those selections using the Not Valid Before/After fields.
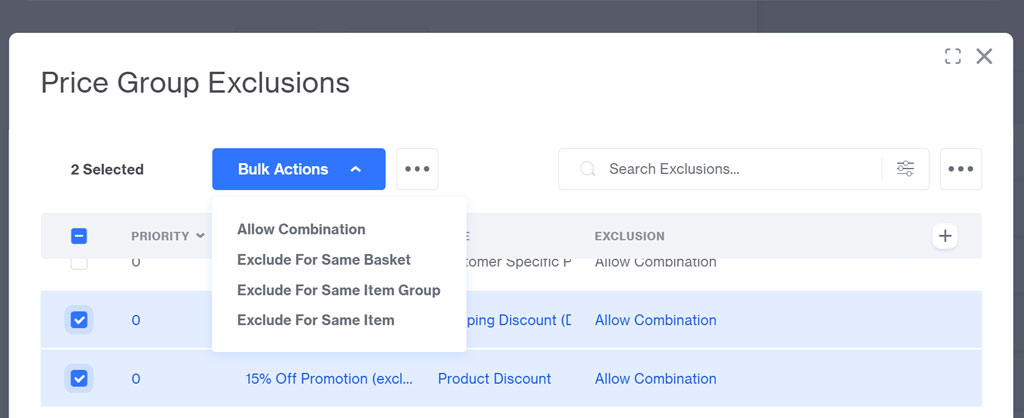
- The Configure Exclusions button will allow you to select how you’d like this price group to interact with other existing price groups. For example, if you’re offering multiple promotions at the same time and would like the shopper to choose one, you can exclude other price groups using the Exclude for Same Basket setting.
Step 4: Qualifying Products/Categories
| IMPORTANT: If you have decided to add a restriction in any of the “Qualifying” fields from #8 above, you’ll need to dictate which products are considered “Qualifying”. If you did not set that restriction, you can skip this step! |
- Once you’ve finished configuring your Free Product Price Group, click the blue Save button. You’ll be returned to the Price Groups tab of the Marketing screen.
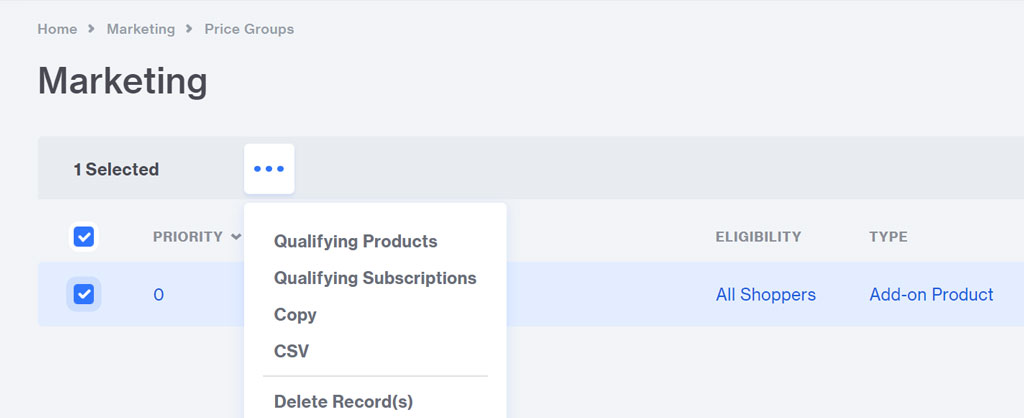
- Find the price group you’ve just created and click the checkbox to the left to select it.
- With the price group selected, click the “ … “ menu and choose the Qualifying Products option. (If you’d like, you can select an entire category at a time by choosing Qualifying Category instead.)
- Use the search to find any products/categories you’d like to mark as “qualifying” and click the Assign toggle to turn those items on. The button should turn green.
| TIP: Use the Advanced Search function to easily narrow down your products by a large range of different options. |
Step 5: TEST!
The most important step in any promotion or discount set-up is the testing. You, of course, want to avoid announcing a big promotion to your newsletter subscribers, your social media followers, and the shoppers on your site, only to then be hit with a flood of complaints that the promo doesn’t work.
This is how recommend testing your price groups:
- Temporarily change the price group Eligibility to Specific Customers. Save and close the price group.
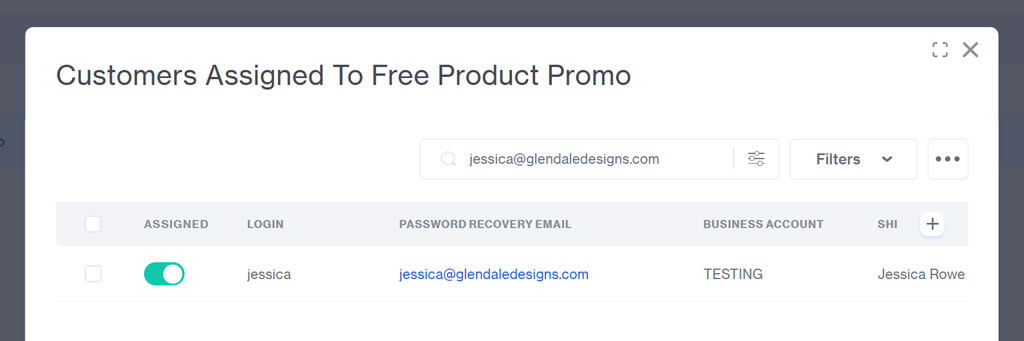
- Select the price group’s checkbox and click the “…” menu. Select the Customers option.
- Search for and assign your own customer account. If you don’t already have an account on your site, you should! Sign up, and assign yourself to the price group.
- You can now test the price group on the site while you’re logged in. Just remember! Switch the Eligibility back once you’re done testing.
Free Product Via Price Group: Pros and Cons
Pro: The shopper isn’t required to do any additional work to receive the free product. It’s added automatically to their cart once they reach the necessary requirements.
Con: In our opinion, the biggest setback with the Price Group method is that you can’t easily offer items that are variants, or require attributes to be selected. Depending on your product catalog, this might seriously diminish the number of products you can offer.
Pro: You are able to tailor the requirements on a granular level. Be as specific as you want when setting up the promotion restrictions and requirements, or leave it broad.
Con: The large amount of settings available may be a hindrance if you aren’t comfortable or confident with the setup. While you can keep it simple, there are so many moving parts with price groups that it’s easy to slip up and end up with an error.
Option Two: Free Product Via Upsell
Miva offers an upsell option that is entirely separate from the price group section of the admin. The setup is much simpler and produces a more pronounced result. While the price group method will add a product to the basket as soon as requirements are reached, the Upsell option asks your shopper to participate and make a decision as to whether they want to take advantage of the promotion.
Step 1: Create Your Upsale
To set up your Upsale product, you’ll be working in the Marketing screen of your Miva Admin.
- In the Marketing screen, click the Upsale tab.
- You will be shown a screen that will list all upsale products currently in place on your site. If this is your first time setting one up, this space should be blank. Click the blue Add Upsale button.
- Search for your product code. This is going to be the code for the free product that you are going to give away during the checkout process.
Step 2: Determine Your Settings
While the Upsale method isn’t as complex as the Price Groups, you do still have some settings you can configure.
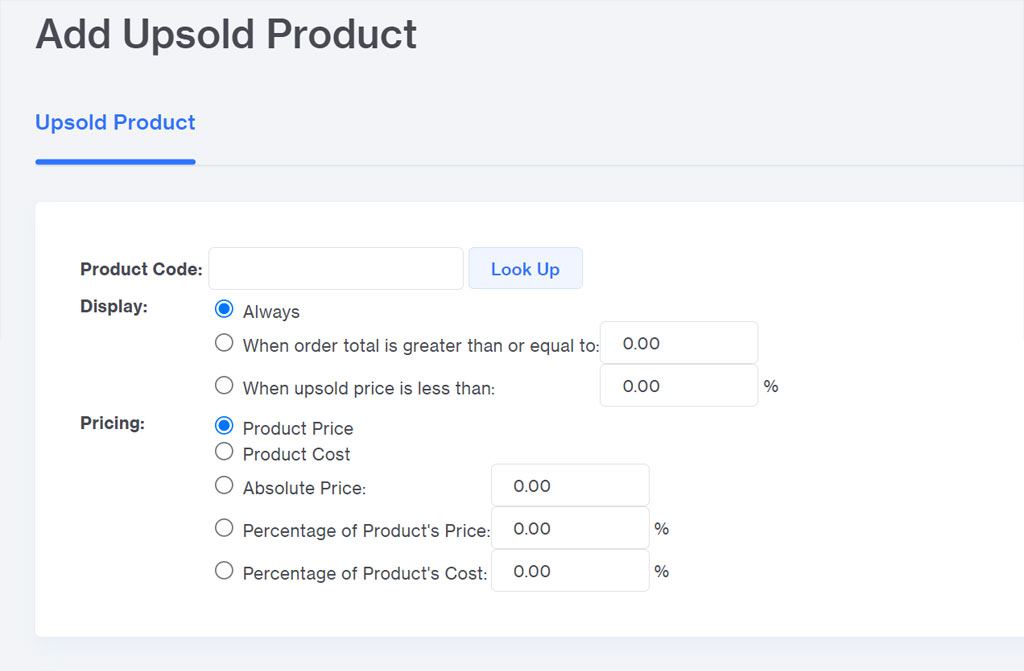
- Choose when to display the upsell product:
- Always. Simply, the upsell product will be offered to every shopper during the checkout, regardless of their purchases.
- When order total is greater than or equal to. This allows you to set a basket minimum that the shopper must reach before they are offered the free product.
- When upsold price is less than. If you’re specifically offering a free product, this option won’t be of use to you. You’re able to enter a percentage so that the upsell product is only available when it’s under a certain threshold compared to the basket total.
- Make the product free by selecting the Absolute Price option and set it to 0.00.
- Click the blue Add button to complete this stage of the process.
Step 3: Choose Your Required Products
Once you’ve added the upsale product, you have the option to configure Required Products. If you want the free product to be offered no matter which product is being purchased, you can skip this step! This is only applicable if you want the free product to depend on another item being purchased.
- Click the Required Products tab.
- Search or scroll to find the product(s) you’d like to add as required.
- Click the Assigned toggle to turn items on.

Free Product Via Upsell: Pros and Cons
Pro: The customer has more control in general. They get to fill in any necessary or optional attributes, and they can decide if they even want the free product. If you’re giving away a free bar of goat’s milk soap, a vegan shopping on your site may want the option of refusal.
Con: We never like it when the checkout process is interrupted. That is exactly what the Upsell version of the add-on product does. By presenting an entire product page in the middle of the check, it gives your shopper a break in momentum, and an opportunity to reconsider their purchase altogether.
Pro: A quick and simple setup lets you create this promotion with very little headache. There are limited options for restrictions which means you can get it set up and working (and tested!) really easily.
Con: If the shopper accidentally adds the product, or adds it then decides they don’t want it, they need to retreat back to the basket page of the checkout to remove it, and start over again, which can be an annoyance. For less savvy site users, it may end up causing increased customer service time when the shopper can’t figure out how to remove it.
Add Your Own Free Product
With these two methods, you have a ton of choices when it comes to offering a free product upon checkout, without having to make duplicate products, or use custom code. Play around with the settings and the promotion details to find something that will suit your shoppers and your products, but always remember to test before making it live! If you run into trouble setting up your free product offer, reach out to us and we can help.