| IMPORTANT: Two people are needed to proceed with this tutorial: An existing administrative user, and the person for whom the account is being created! |
Estimated reading time: 6 minutes
As a store owner, you may find yourself needing to create an administrative user in your Miva account. This is necessary for employees that are responsible for website up-keep, and for any order processing/workflow management. It will give access to the back end of your website. This tutorial will demonstrate how to create non-developer and developer user accounts in Miva.
Note: Setting up two-step authentication (a recommended security feature) will require the use of a TOTP software. We recommend Authy.
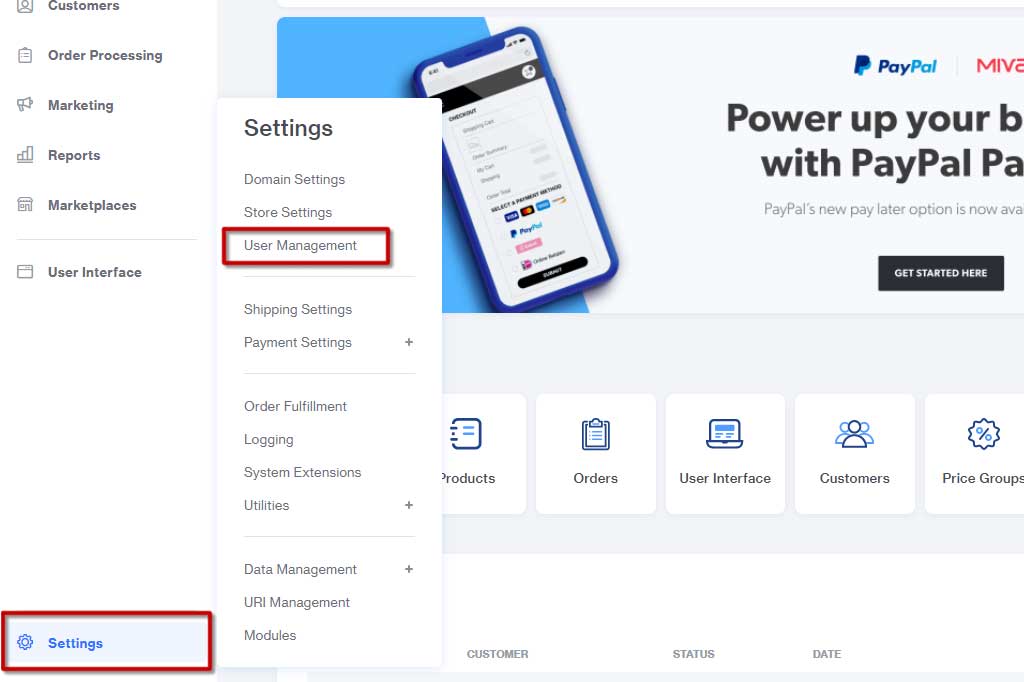
STEP ONE: Access Your User Management Panel
- Log into Miva; click on the Settings menu in the bottom left hand corner.
- Select User Management from the menu.
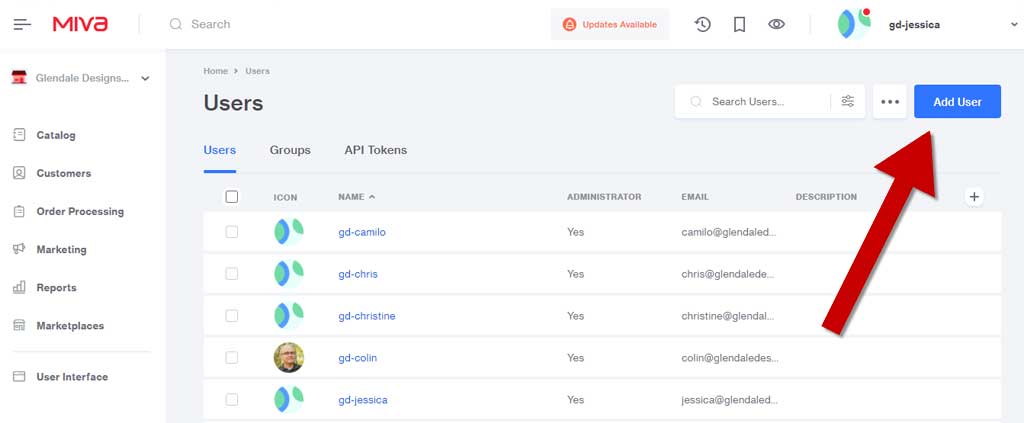
STEP TWO: Create New User
On this page, you will see any/all users that currently have access to your Miva account.
Click the Add User button.
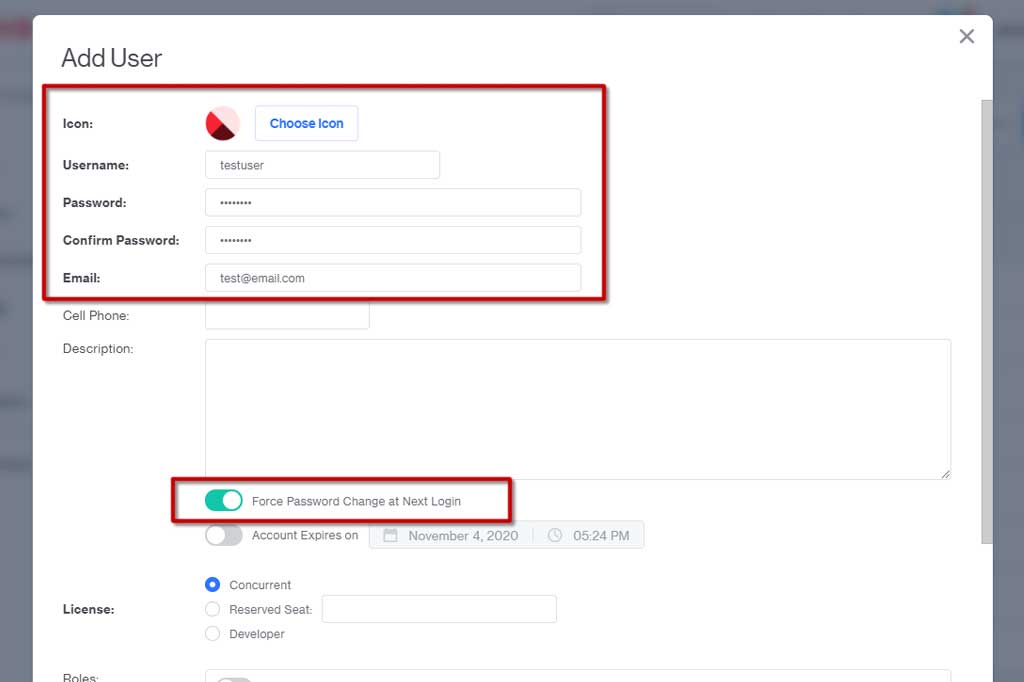
STEP THREE: Fill in Admin User Details
A pop-up window will appear. Here, you will fill in the details for your new user, including their username (this is what they will use to log in), a password, and an email address associated with the account. You can also toggle on the option that will force the new user to change their password upon their first login.
Fill out the following fields:
- Icon. You can select from one of the pre-loaded options, or upload an employee photo.
- Username. This is what the user will enter to log in. Make is short and easily remembered, but unique.
- Password. The password should have a combination of upper and lower case letters, numbers, and punctuation.
- Confirm Password. Re-enter it to confirm.
- Email. This is the contact email that the user will use to receive authentication codes.
- Force Password Change. You can use the toggle to require your new user to change their password during their first login. This isn’t required but it’s a good idea.
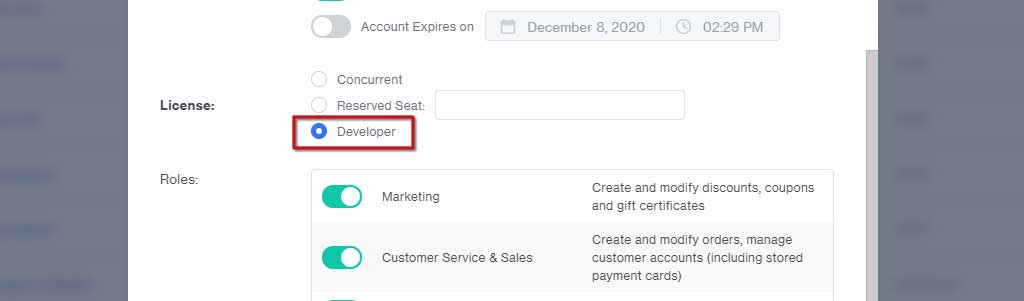
NOTE: If you’re creating a user account to allow your developer to make major changes to your website, then ensure you select the Developer license button. This will require your developer to enter a special key code upon logging in for the first time. This setting should only be used when you will have a developer working on your site.
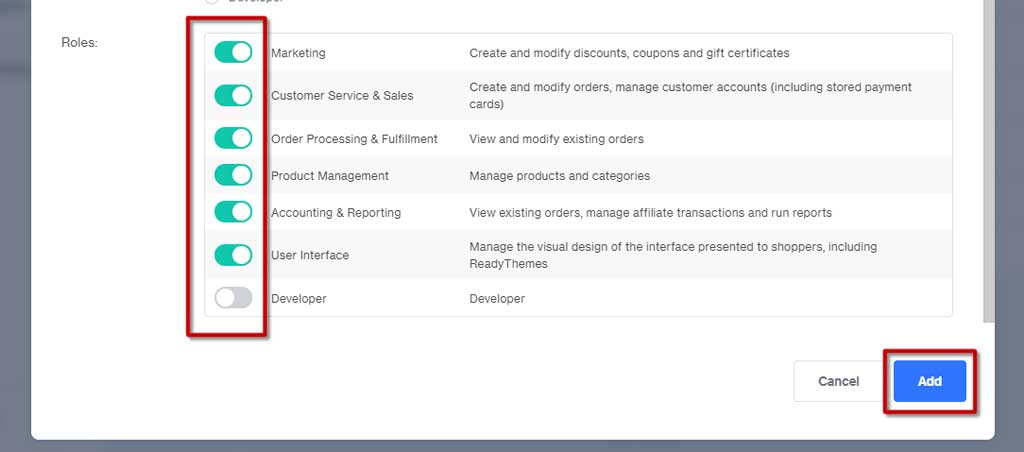
STEP FOUR: Select Roles for the New Administrative User
In the Roles section of this window, you can assign permissions to the new administrative user. This allows you to control what they have access to change. If you have an employee that manages the store for you, it is wise to turn on all permissions.
- Click the toggle buttons to turn on the permissions and assign the roles to the user.
- Click the blue Add button to save the user.
The new user will need to turn on TOTP two-factor authentication themselves.
From this point, the new user needs to step in and follow the instructions!
STEP FIVE: Turning On Two-Factor Authentication
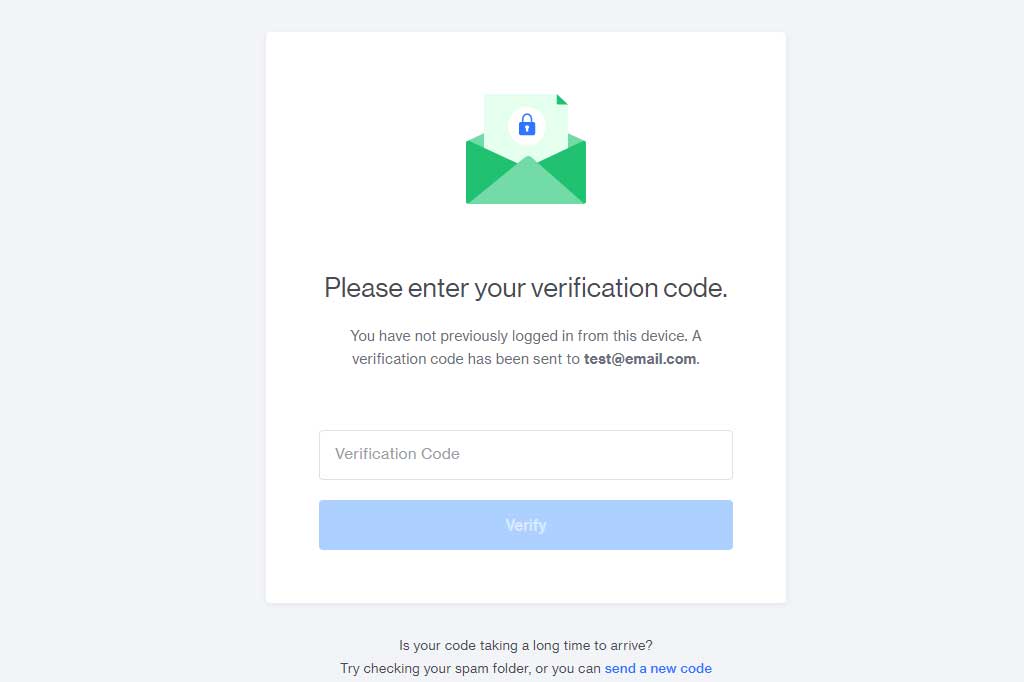
Log into your new account using the username and password set up for you. Upon your first login, you will be sent an email with a verification code.
- Enter this code when prompted.
- Click your user name in the top right corner.
- Select Edit Profile.
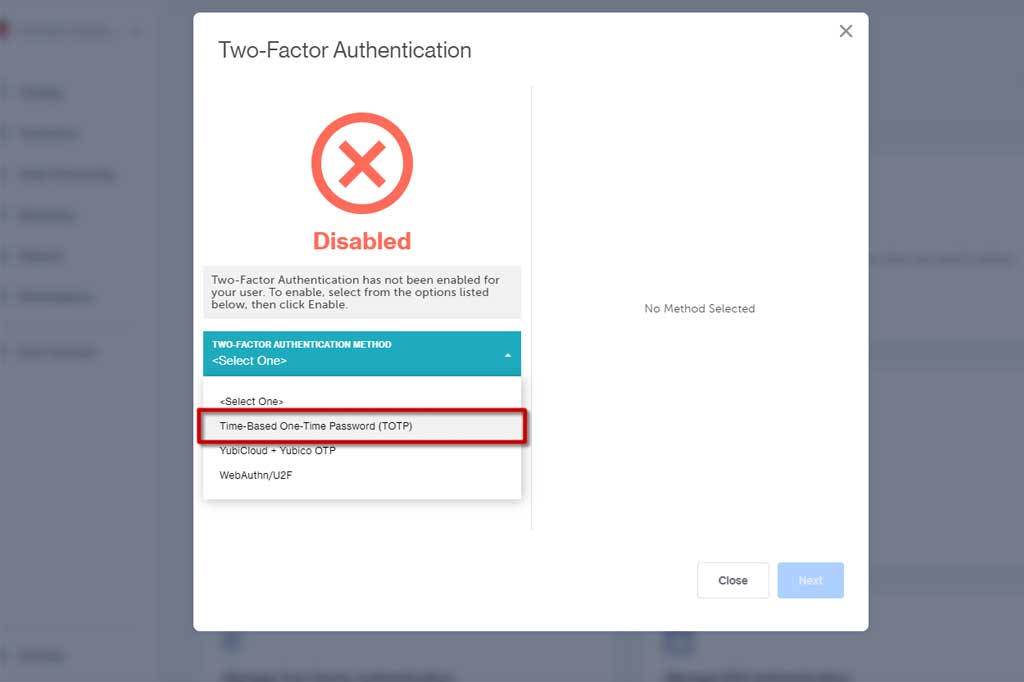
STEP SIX: Enable Two-Factor Authentication
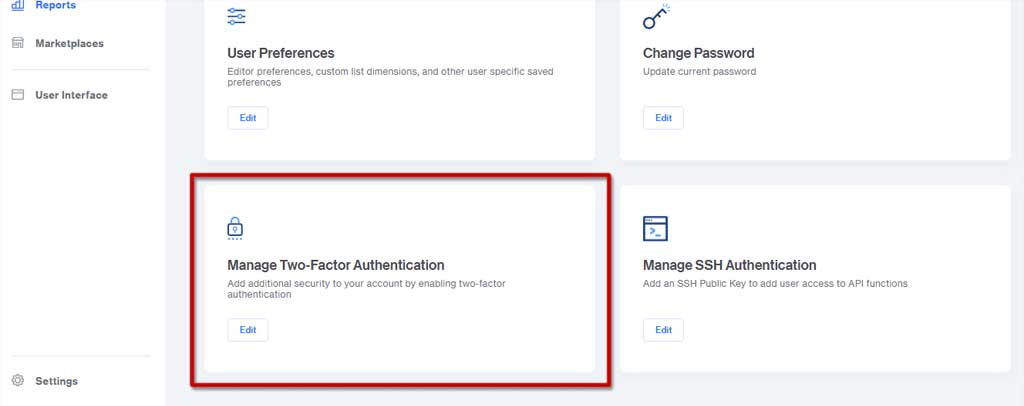
Find the Manage Two-Factor Authentication option and click edit. A new window will open.
From the drop-down list, select Time-Based One-Time Password (TOTP) from the drop down menu, then click next.
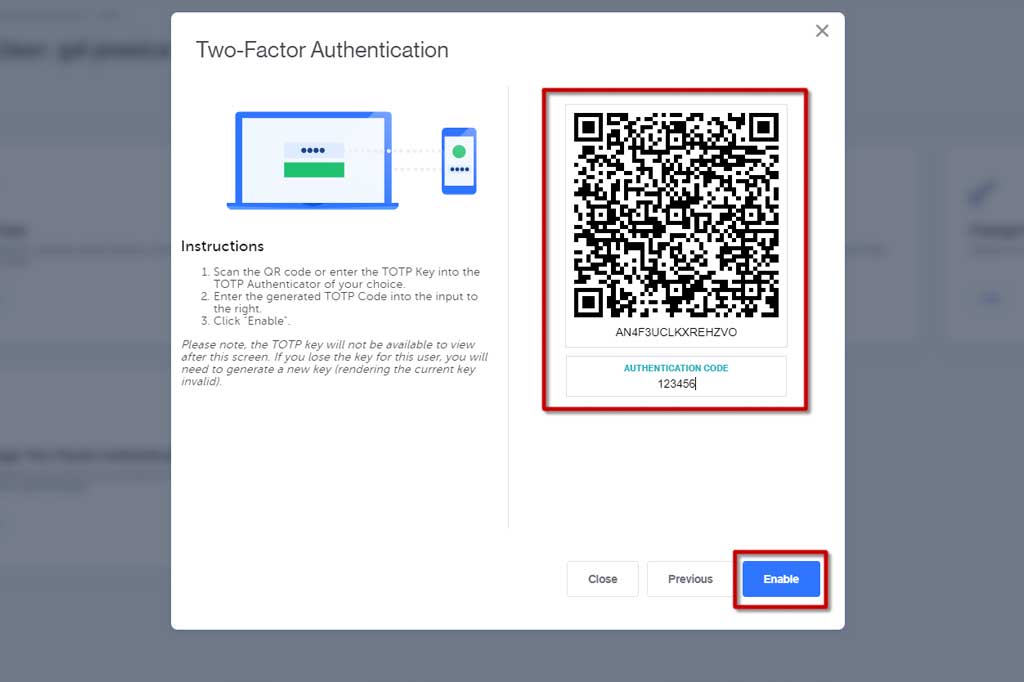
STEP SEVEN: Scan or Copy/Paste the QR Code
This will provide you with a QR code. On your mobile device or desktop, open the Authy application. The three vertical dots in the top right-hand corner will let you add a new account.
Scan the QR code with your phone or copy/paste it into your desktop Authy app. You will be provided with a 6-digit number. This is your time-based one-time password (TOTP). Enter this number into the field in your Miva screen and select Enable.
STEP EIGHT: Save Your Backup Tokens
After clicking Enable, you will be provided a list of 10 codes known as backup tokens. These are codes you can use in case of an account lock-out. Click Download to save those tokens, and click next. You can now sign out of the account, and the Miva account owner will complete this process.
Now back to the original Administrative User!
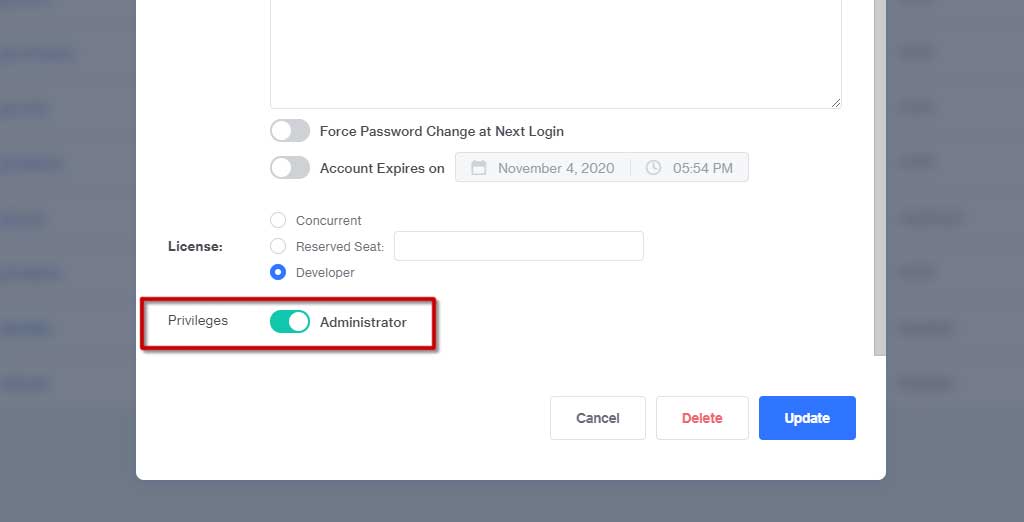
STEP NINE: Enable Administrative Rights
As before, sign into your main Miva account and go to the User Management screen. Click on your new user’s name and the same window as before will pop up.
Turn on the Privileges toggle to grant Administrator access, and click the blue Update button to finish this procedure.
The new user now has complete administrative authority in the Miva account. You can edit these settings at any time.
If you have any questions or need help setting up an administrative user in Miva, contact us at Glendale Designs and we can help.