
Estimated reading time: 6 minutes
Want to get started with Google to take advantage of their free and paid services? This step-by-step guide will show you how to submit a Google Shopping test feed, your first step to a broader reach.
Google Shopping feeds allow you to do more than just sell your products on Google; however now that it’s a free service, that is a great benefit. They also allow your products to appear as rich results for search queries. The introduction of Google’s Popular Products means you now have the opportunity to have your products appear alongside popular brands for free. That’s in addition to paid ads, and Google Shopping pages. In order to participate in any of these features, you need to have a Shopping feed submitted into your Google Merchant Center.
Uploading as a test first allows you to tweak and adjust your entries before they go live. That means you can address any errors spotted by Google, as well as make alterations to suit your own preferences. Continue reading for a step-by-step guide on how to submit a Google Shopping test feed.
Uploading a Google Shopping Test Feed in Merchant Center
STEP 1: Submit a New Test Feed
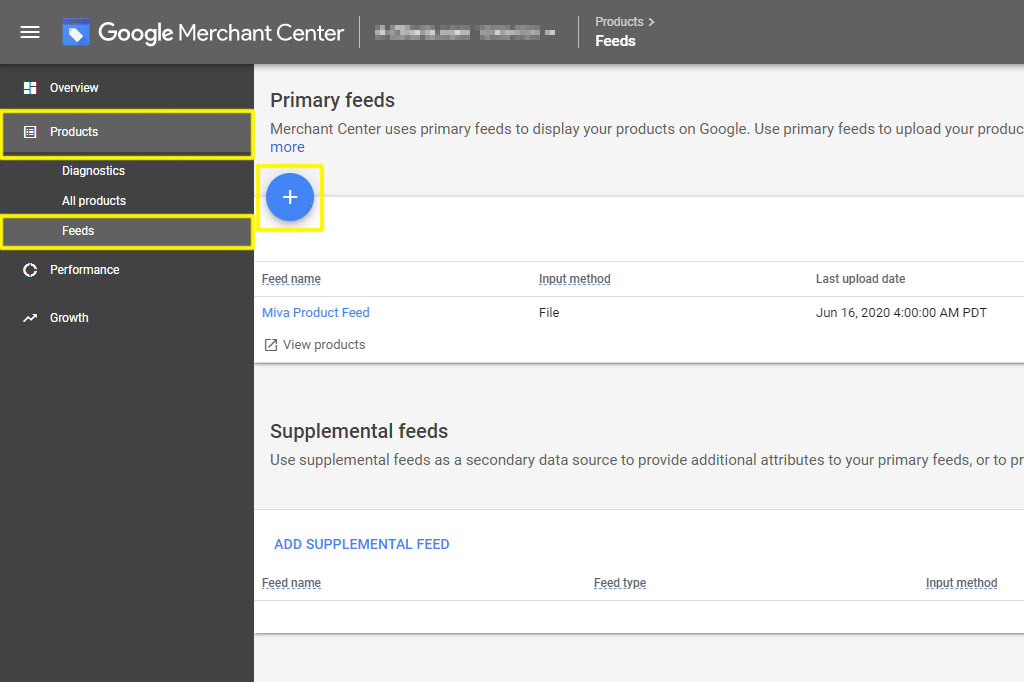
Go to Products > Feeds > click the blue ‘plus’ sign
Begin by logging into your Google Merchant Center. If you don’t already have one, follow along with Google’s instructions. If you need help, or would simply prefer not doing it yourself, we’re happy to help.
- Click on the Products tab
- Select Feeds from the left-hand menu
- Click the blue + button to add a new feed
- You must already have a test feed file to proceed. If you don’t have one or don’t know how to get one, let us know, and we can help.
STEP 2: Basic Information
Fill out the required information.
You’ll be directed to a three-step process to add your new feed. To begin with, enter your basic information. That includes:
- Country of Sale. Choose your biggest market.
- Language. Select the language in which you operate. Again, choose your biggest market.
- Destinations. This will determine which area your feed applies to.
- If you use “Shopping ads”, select that box.
- “Surfaces across Google” is what allows your data to appear in the rich search results. Keep this box checked.
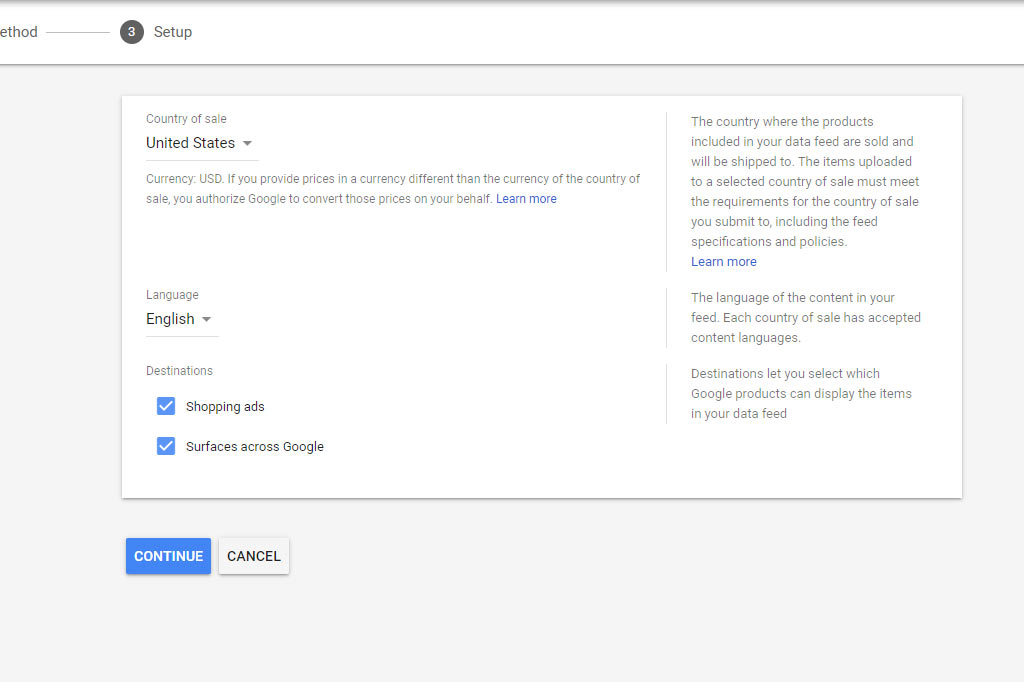
- Continue onto the next step.
STEP 3: Primary Feed Name and Input Method
Enter a name and select Upload.
Following the instructions from Google, enter your feed file name. Because this is a one-off test, you’ll want to select Upload as your input method. If you were setting up a regular feed, approved to go live, you might select one of the automated methods.
- Enter the Primary Feed Name (enter your file name)
- Select Upload (make sure to have your feed ready to upload first)
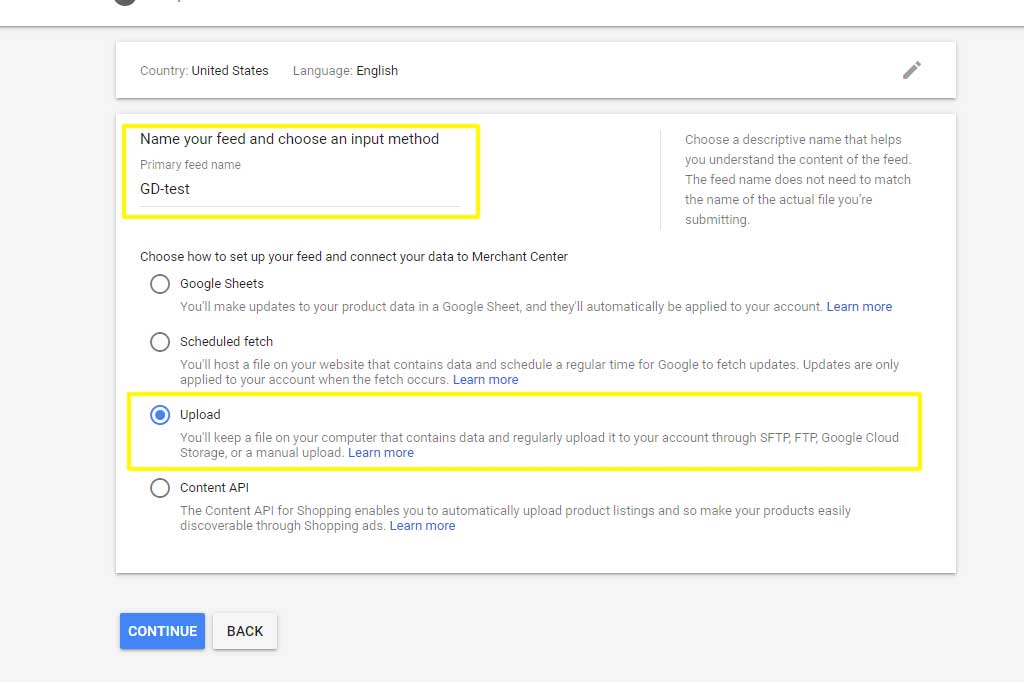
- Click continue to move to the last setup step.
STEP 4: Setup
Upload your file and submit it as a test.
Once again, enter your test feed file name. Select the Upload a file now button. Be sure to click the Upload as a test checkbox. This is VERY IMPORTANT. Upload your file by either dragging and dropping to file into the window, or clicking BROWSE to search your computer.
- Enter the name of your feed file
- Click on the Upload a file now text
- Select Browse to locate your file, or drag-and-drop the file into the window
- Select the Upload as test checkbox. You MUST upload the file as a test
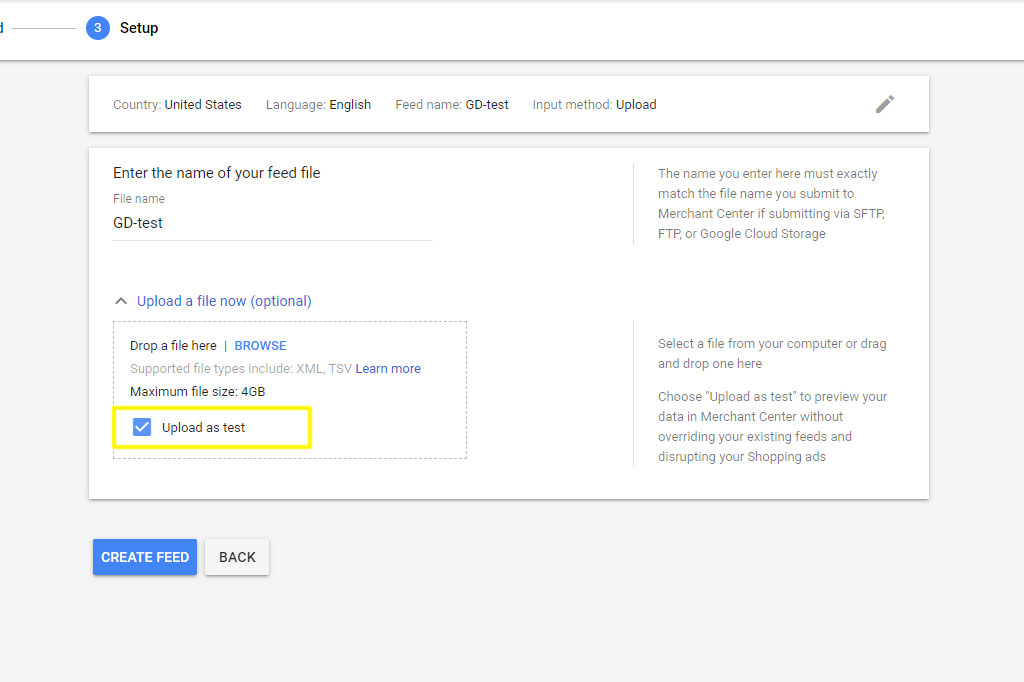
- Click the blue CREATE FEED button to finish the process.
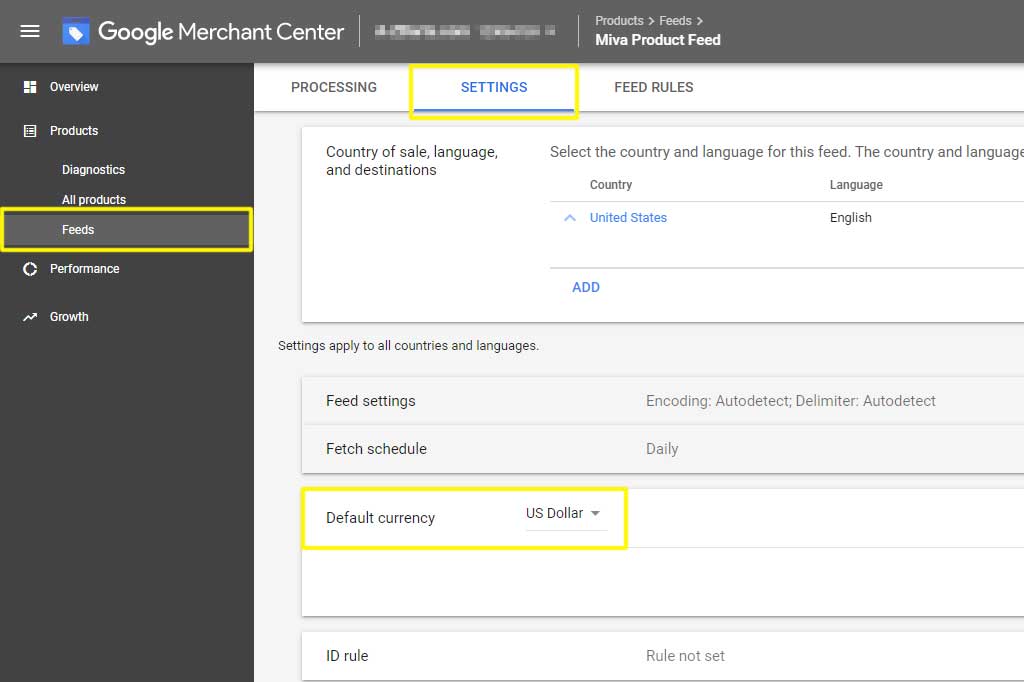
STEP 5: Set Currency
Because this is a test file, you cannot set the currency prior to uploading the feed. That means in order to ensure your Google Shopping test feed is showing the correct information, you need to change the setting, then double back and overwrite the file. This step ensures the setting takes effect and will prevent Google from showing you false errors.
- Go to Products in the left side menu
- Select the Feeds option
- Click on the name of the file you just uploaded
- Select the Settings tab
- Set the Default currency setting to your main sale country. If you sell mostly in the United States, select USD.
- Return to step one to re-upload your test feed. This will overwrite the first file and apply your currency setting.
What To Do After You Submit a Google Shopping Test Feed
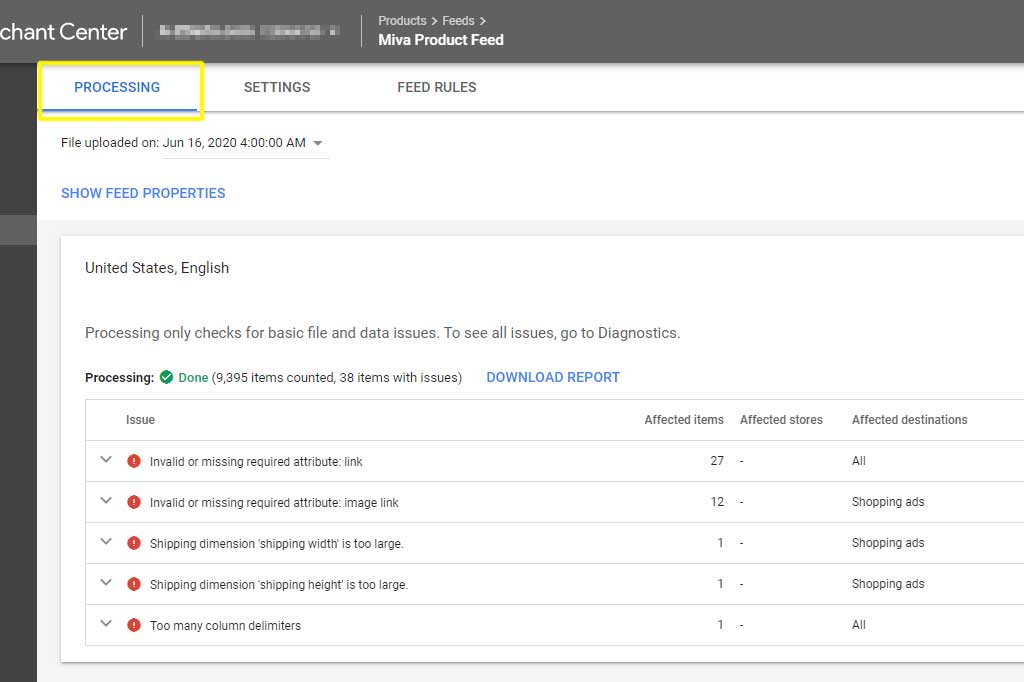
Once your feed has been submitted, you can click on the feed to view the specifics. When you navigate to the PROCESSING tab, you’ll be provided with a list of any errors or warnings. Click the down arrow next to each of the errors to view more details, and information on how to correct them.
Review the errors, and make any necessary corrections in your data. When you feel you’ve fixed them all, re-upload another test to confirm. If you’re having trouble with errors in your feed, get in touch with us. We can help in setting up, testing, fixing, automating, and maintaining your Google Shopping feed for you.